Tag Archives: Miss La Belle

FO: pink leopard rock and roll dress

31 Jul

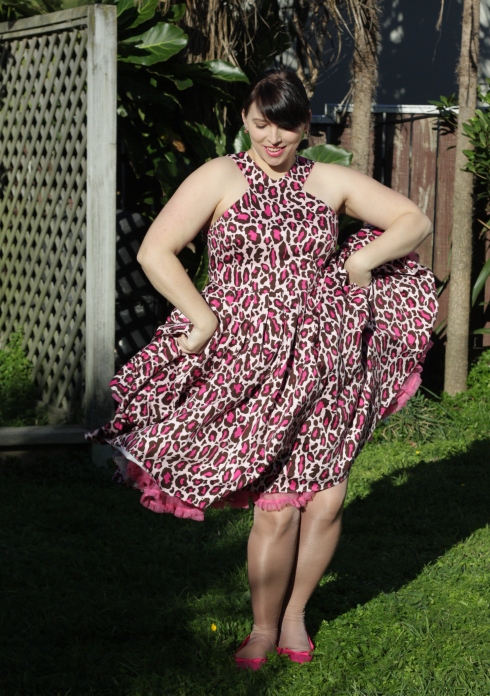
It’s been a long time coming, but I’m stoked to be able to share my pink leopard rock and roll dress with you!

Bedroom eyes!

Bedroom eyes! Or psycho eyes. We weren’t sure. Photo courtesy Sarah

Like my skull and roses dress and flame dress before it, this was my annual make-the-most-crazy-dress-I-can for the Feet With Heat Dancer’s Ball (see here and here).

I first found and fell in love with the fabric at Global Fabrics (now The Fabric Store) a few years ago, but managed not to buy any. Then the fabulous MrsC gave me a remnant for my birthday a few months later!

Skip forward a couple of years and I’m planning my ball dress. I decided I want pink leopard and am hunting for a quilting cotton in the perfect shade of hot raspberry when I get a text from MrsC – “Global still has the pink leopard, and it’s HALF PRICE!!!” Although not the shade I had imagined, one does not look a pink leopard gift horse, err, leopard, in the mouth, so I strode in. As luck would have it, I ran straight into MrsC who was also succumbing to the sale (although, not on pink leopard) so she supervised as I took the bolt to the counter.

“4m please” I said. That’s plenty for a rock and roll dress.

MrsC cleared her throat. “She’ll take 10m thanks.”

“10m! Have you lost your mind!” I screeched.

“Trust me. This is like a SIGNATURE print for you. I’ve never forgiven myself for not buying more of that rose printed silk-cotton that I made the dress out of that I wore until it disintegrated. You’ll use it. Or you could sell it if you change your mind later. And it’s such a good price. Trust me…” she wheedled.

I have many mottos but one is never argue with your Wise Woman Advisor. I asked for 10 metres.

The assistant unrolled the fabric. At 4 metres we discovered it was cut. MrsC gave me the gimlet eye so I ask to to take the 10 metres in two pieces. The assistant measured out the remaining piece and there was only 7 metres on the bolt. MrsC now turned her gimlet eye to the assistant and suggested they give me the entire 11 metres – but only charge me for 10, due to the cut.

They obliged. And THAT is why you never argue with your Wise Woman Advisor. You want her on your side.

Dainty shot

Dainty shot. Photo courtesy Sarah

The fabric is cotton spandex blend, but heavy, more of a twill weave than a sateen weave. I settled on Butterick 5033.

Butterick 5033

Butterick 5033, I chose View A

First up, the mock-up. I did my normal trick of finding the finished measurements (for Butterick, printed on the bustline and waistline on the tissue paper) and graded between the sizes that looked the best, completely disregarding the size chart. After a hilarious episode where I attempted to teach Mechanic Man to pin the centre back closed (honestly, the man can strip and rebuild an engine, but explain to him that the pointy bit goes in and comes out parallel to but 1.5 cm away from the edge and he’s completely lost), I got into the bodice. And WOE! Woe is me! The bottom wouldn’t even touch.

My first bodice toile. Oh no!

My first bodice toile. Oh no!

I mournfully looked at the photo that Mechanic Man took for me and started mentally calculating the potential-faffing-about-factor, and resolved there was only one solution.

One does not have a Wise Woman Advisor in the family just for fabric peer pressure. I took my bodice to MrsC.

I’d already resolved the shoulder seams needed to be reduced to 1cm, and did this on arrival. Then I got pinned in (with much more efficiency) and waited for the diagnosis. MrsC, in the magical ways of Wise Woman Advisors throughout the ages, clicked her tongue, produced a ribbon, tied it around my natural waist, cut off the fabric under the ribbon, and pronounced it fixed.

No, seriously. It was a perfect fit. Just Like That. (Wise Woman Advisors – you should get one).

Swishy shot

Swishy shot. Photo courtesy Sarah

It was a piece of cake after that. I lined the bodice with some hot pink stretch cotton poplin I fortuitously bought at the same time I bought the black stretch cotton for the bodice of my flame dress with the startlingly acute realisation that pink would feature in my future (and likely will over and over again). I measured the seamline on my new bodice and the skirt and they were so close I decided not to adjust the skirt, but to make as per the pattern and take in the side seams if needed to meet the bodice. It’s not like the skirt of that volume would suffer.

I did however discover the underarms sagged quite unattractively. So I used MrsC’s taping method and eased it on quite aggressively. Perhaps too aggressively, there are some little puckers when I’m not wearing it, but I’m totally pleased with the effectiveness of this technique.

Armhole before taping, You can see that much of my bra because of the gaping.

Armhole before taping, You can see that much of my bra because of the gaping.

The other side, already taped, and fitting close to the skin

The other side, already taped, and fitting close to the skin

The skirt was a bit of a deliberately brave move for me. It has a centre front seam and three knife pleats either side. Did I really want pleats in the centre front or should I stick with a circle skirt? Did I need the extra bulk right of pleats and all that additional fabric right over my prominent tummy?

That was the thought that did it for me.  As a body positivity enthusiast, but not yet very experienced self-practitioner, I decided to give a silent SCREW YOU to whoever decided that women only look good with tiny waists and wear the skirt because I like it and that is the only opinion on the face of the planet that matters when it comes to what I wear. Plus, you know, I’d never made pleats before.

The pleats were easy, the skirt sewed up really straightforward (although I did get worried at one point as I attempted to maneouver the entire skirt across my sewing table that I was going to get trapped under it and weeks later they’d finally find me buried under 3 tonnes of leopard print) and the dress was done!

More swishing. Big skirts plus petticoats demand it.

More swishing. Big skirts plus petticoats demand it. Photo courtesy Sarah

I had originally decided to do the cutout, for a few reasons. First, it’s on the pattern. Second, I like cut-outs on principle. And third, I need lots and lots of ventilation in a dancing dress. But after putting the bodice together, I was worried about attempting the cutout. What if I hated it? What if I cocked it up? I certainly couldn’t undo it! So I made a sample to test out the method and the look. I wasn’t convinced.

So I took my sample along to the WSBN meet-up at the Home Sewn exhibtion at The Dowse Museum (which I never blogged about but others did). The conclusion was pretty universal. Cut out plus pink leopard might just, well, go in a direction that I didn’t want to go in. So I abandoned that. But one day, I will make this dress (or a variation thereoff) and the cutout WILL happen! (Entertaining side story, as well as passing my sample around, MrsC did an impromptu bodice fitting in the middle of The Dowse, in a room filled with hundreds of people, to the entertainment of the WSBN members watching.)

Twirly!

Twirly! Photo courtesy Sarah

The weekend of the ball I had my regular monthly craft day at my house, and my lovely friend Miss La Belle attended. A couple of days before, at class, a fellow dance student asked if Punk Flatmate and I would be wearing matching outfits again, as they’d loved the matching flame outfits, and almost the same day Collette released their tutorial for a men’s necktie. Miss La Belle was looking for a project to do and volunteered to make the neck tie out of the scraps of my dress, and it came out AMAZING. But her awesomeness doesn’t stop there. Inspired by the pink and chocolate combination, she also made me two pairs of earrings and a necklace in that colour combo! I wore the studs on the night.

Lots of skirt!

Lots of skirt! Photo courtesy Sarah

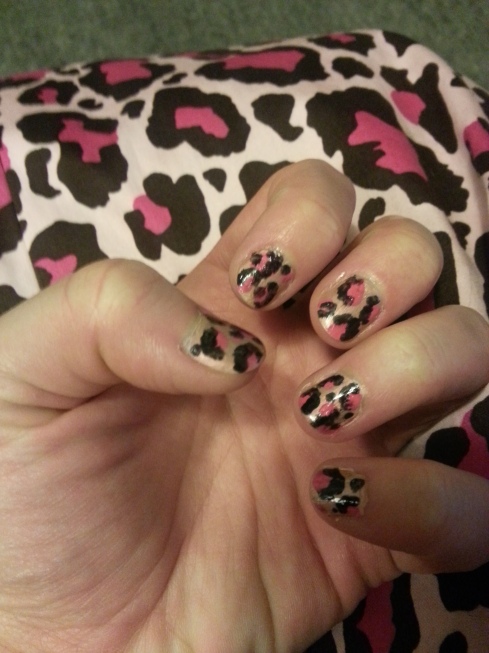
The day of the ball rolled around, and as I normally do, I booked the skilled Claire of The Vanity Case to do my hair and makeup. Miss La Belle decided not to stop her awesomeness just with a necktie and jewellery and came over on the day to day Punk Flatmate’s hair pink to match and also painted my nails for me. IN PINK LEOPARD. Hell yeah!

Oh yeah. Pink leopard fingernails!

Oh yeah. Pink leopard fingernails!

I think it was one of the best hair and makeup jobs Claire has done yet, and I couldn’t believe it was really me in the mirror when she was done. Unfortunately, she’d had a really slim window to come over before I had to leave for the ball, so I skipped photos at home, thinking I’d use the event photographer to make up for it. She did take this snap on her phone though.

Hair and makeup by The Vanity Case

Hair and makeup and photo by The Vanity Case

Unfortunately, there was no event photographer! So Punk Flatmate and I asked some friends to take some snaps, but none of them really turned out spectacularly, but I’m still pretty sure you can get the idea that WE LOOKED FREAKING AMAZING HELL YEAH WE DID.
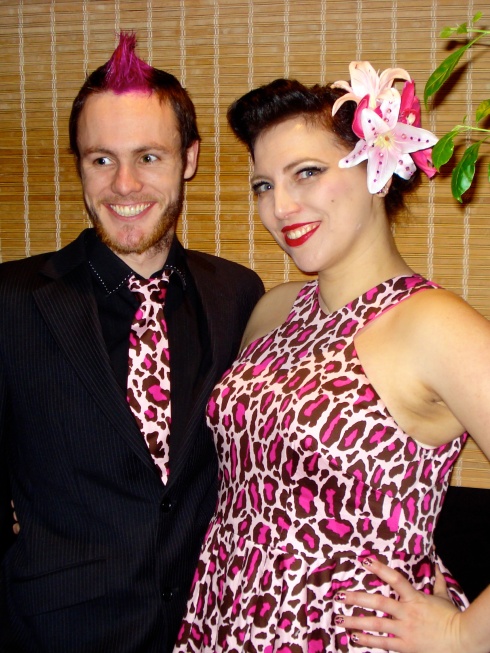
We're looking at two different cameras, whoops! But check out that awesome tie and matching mohawk! Isn't he gorgeous!

We’re looking at two different cameras, whoops! But check out that awesome tie and matching mohawk! Isn’t he gorgeous! Photo courtesy Julian. Or Chris.

But the lack of event photos means no action shots of my skirt and petticoats flying and flashing my hot pink knickers I bought for the occasion. But I can’t leave you without a twirling pic at all can I!

Obligatory mid twirl photo

Obligatory mid twirl photo. Photo courtesy Sarah

Guess what! There are two more items for this ensemble to show off. But given my complete inability to blog in 50 words or less, I’m saving them for the next post!

FO and MOS 11 – 13/52: a necklace, cushions, and tees

28 Oct

As I’ve said, not all of my 52 moments of satisfaction have to be big things. Sometimes the small things are important to do.

So here is a round-up of three projects I’ve done so far this year.

Grace’s necklace

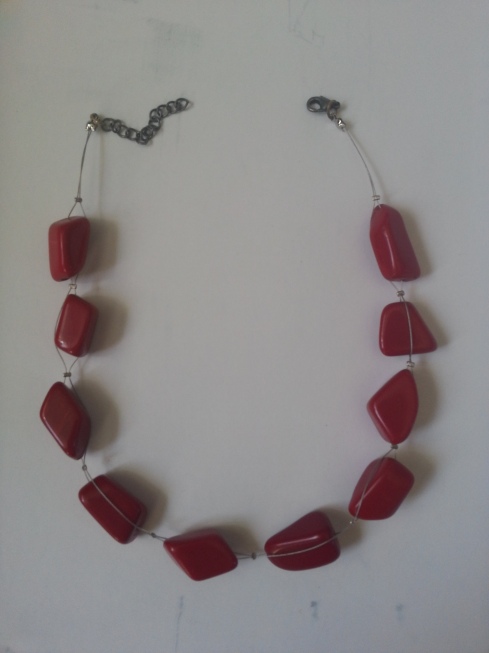
When I wore my flame dress to the 2012 Feet with Heat ball, I didn’t really have any suitable jewellery. My dear friend Miss Busty La Belle kindly lent me a necklace, earrings, and flowers for my hair. But when I took the necklace off I noticed it was broken in one place. So I held onto the necklace, dismantled it, and remade it for her as a tiny token of thanks. Easy and satisfying. And of course, now I need to make something similar for me to wear as it worked so well with my outfits!

The chunky red necklace I remade for Miss Busty La Belle. It's red semi-precious stone of some variety and tiger tail.

The chunky red necklace I remade for Miss Busty La Belle. It’s red semi-precious stone of some variety and tiger tail.

Velvet cord cushions

Another dear friend wanted to learn to sew, and I offered to show her the basics. So in 2012, when she had new curtains made, she decided to make matching cushions out of the leftovers. She brought over the cushions and the offcuts and we set about making the cushions. We decided we wanted an offset back zip, and drafted all the pieces while I told her the basics as we went. But starting to sew is a slow business. We cut out all four cushions but made only one of them. She was thrilled to take that home but the rest stayed at my place.

The same day she told me she was pregnant! (I’ve since given her knitted booties). Since then we were both so busy that catch-ups were infrequent, with certainly no sit-down-and-sew time.

Much later I came across the cushion inners and cut out fabric while tidying up and thought to myself. “She’s only weeks away from birth. She’s up to her ears in renovations. Eight of her relatives are coming over from the UK in a couple of weeks and they’re all staying in her house. And then she’ll have her baby. Yeah – she won’t be sewing any time soon.”  So I decided to finish the remaining three cushions for her as a present.

The fabric is a rusty pumpkin velvet-like cord and a pain in the ass to deal with, as most fabrics with a pile are, shifting all over the place regardless of pins. I wasn’t going to hand baste cushions for crying out loud so I ended up using double sided fusible hem tape to “baste” the seams in place, and stitched just inside the tape. Even with the stuffing around with the hem tape the covers came together in only a couple of sewing sessions, and their new owner is delighted to have cushions in their freshly renovated lounge. I’m thrilled to have helped her out, thrilled not to be storing the project any longer, and delighted that my three centred zips came out great!

One velvet cord cushion! I'm never sewing with this stuff again.

One velvet cord cushion with perfect zip! But I’m never sewing with this stuff again.

The velvet cushions scattered on my friend's sofa, matching cushions behind. I really have to work on my photography skills.

The velvet cushions scattered on my friend’s sofa, matching cushions behind. I really have to work on my photography skills.

Heat set vinyl tees

Last year a friend told me he really wanted a “Han Shot First” tee and as I was looking for ideas for a birthday present for him, I mentally pinned that. But after some googling I didn’t really find anything that hit the right balance of coolness and price. So, of course, I decided to make him one. I asked around some friends for recommendations of getting shirts printed and found a friend of a friend with a vinyl cutter who offered to cut some heat set vinyl for me.

Thrilled by this, I extend my plan to include a tee shirt with an in-joke for another friend of mine, and a teeshirt for my Mechanic Man partner branded with his business logo.

I asked another friend, a graphic designer, to put together the digital files needed to talk to the vinyl cutter and emailed them off.

Then one lovely night I went around to vinyl-cutter friend’s house and watched as she set her machine a whirling. Then we companionable sat and talked while she showed me how to prep the vinyl and helped me iron the vinyl onto some RTW teeshirts – which requires a surprising amount of muscle.

And ta-dah! Three custom designed and printed tees. Now I know in some ways I didn’t actually make anything – one friend made the digital files, another operated the vinyl cutter, and the tees were ready made, but I’m claiming this as a project because I’d been thinking about it for ages, it was all my idea and my coordination, and because it’s my blog and my head and my life and what exactly are you going to do about it?

Well, he did.

Well, he did.

It's an in-joke. I guess you had to be there.

It’s an in-joke. I guess you had to be there.

The back of my Mechanic Man's tee, with the friend who cut the vinyl and helped me apply it looking triumphant

The back of my Mechanic Man’s tee, with the friend who cut the vinyl and helped me apply it looking triumphant

Mechanic Man was so delighted with his tee that it took another three months before it was off him long enough for me to iron on our logo to the front.

The front of our tee. The little white squiggle in the corner is the logo of the friend who helped with the vinyl cutting, as an acknowledgement.

The front of our tee. The little white squiggle in the corner is the logo of the friend who helped with the vinyl cutting, as an acknowledgement. Another lousy photo, WTF am I doing?

They may only be little things, but they made me happy to do, and that is what it’s all about, right?

FO and MOS 10/52: Peggy Sue cardigan

13 Oct

I can’t hear the words Peggy Sue without hearing this song in my head. But this isn’t a story about a song. It’s a story about this cardigan. A looong overdue story about a cardigan I knitted all by myself.

So proud of myself for knitting a whole cardigan!

So proud of myself for knitting a whole cardigan!

This was my summer 2012 knitting project. After learning to knit Christmas 2011 and spending 2012 knitting baby clothes and slippers, I wanted to graduate to making grown-up garments. But I knew I’d want Mum around to help so waited until my Christmas 2012 holiday at Mum’s to crack into it.

I started looking at patterns and yarn months earlier, emailing links and scanned patterns to Mum for her perusal. Eventually we settled on Peggy Sue – the pattern was free (here from Ravelry) and Mum decided it was a suitable balance of easy but not boring with a couple of new skills.

I cast on on Christmas day 2012 with my new Knitpro needles (having swatched earlier and Mum giving me the right sized needles that day as a Christmas present!) The pattern was easy to follow and flew off the needles. I cast off on January 6 and sewed on my buttons and wove in the ends the day after, making this my first make of 2013. I was DELIGHTED.

My first day's effort. I knitted for about 8 hours straight after casting on at lunchtime.

My first day’s effort. I knitted for about 8 hours straight, after casting on at lunchtime.

I made some alterations to the pattern, all in the length. I shortened the stocking stitch portion so it finished just under my boobs, and did one or two sets less of cable ribbing so that the finished length sits on my true waist (which is naturally high). And I lengthened the sleeves so they finished just above the elbow as the yarn was so super smoodgy that I was worried it would be too warm for super short sleeves. Otherwise I knit it as written. I was exactly in between sizes so went for the smaller of the two to ensure a close fit.

I was determined to finish the cardi so knitted everywhere, including in the car on the way to Russel

I was determined to finish the cardi so knitted everywhere, including in the car on the way to Russell!

Although the vast majority of this is stocking stitch, it does have a cable rib section. This was my first time doing cable and I really enjoyed it, so I’m looking forward to working more of this in the future.

I do want to stabilise the button band with ribbon to stop the ripply edge that the cardigan gets – this is in the pattern photo too so it seems to be the thing, but I don’t like it! So it’s been sitting in my mending pile all winter – better get on to that soon!

I love the cropped length and slightly longer sleeves

I love the cropped length and slightly longer sleeves

The yarn is Urban 8 ply machine washable wool from Skeinz, and it’s lovely. Unfortunately I haven’t worn it much. This year we had the most amazing summer in Wellington ever, stretching well out into what should have been autumn – then turning into winter almost overnight. I went from singlet tees to merino thermals without much lingering in the middle. However, as we head into spring now hopefully it’ll get a lot more use. I do still worry that the sleeves should be full length, in case as the finished garment is too warm for the sleeve length I’ve got, but I think it’ll be a great season transition piece – if we ever have seasonal transitions.

No bagginess at the back, yay!

No bagginess at the back, yay!

Although I’ve never knitted a traditional make and sew knitted top, so proper scientific comparison is impossible, I’m already enamoured of the top down all-in-one method as it’s great for fitting and it’s so exciting to cast off and tadah! Have a finished object sitting in your lap.

I have since cast on another cardigan for myself but progress this year has been SLOW. I’ve taken a leaf from Lladybird and started knitting in my lunchbreaks, although have inadvertently ended up agreeing to teach a colleague to knit as a result. Whoops! However, in the last couple of weeks since knitting at lunch it’s really started moving along so fingers crossed it’s finished soon!

A close up to shot the neat cable rib band at the neck and the moss stitch band

A close up to show the neat cable rib band at the neck and the moss stitch button band

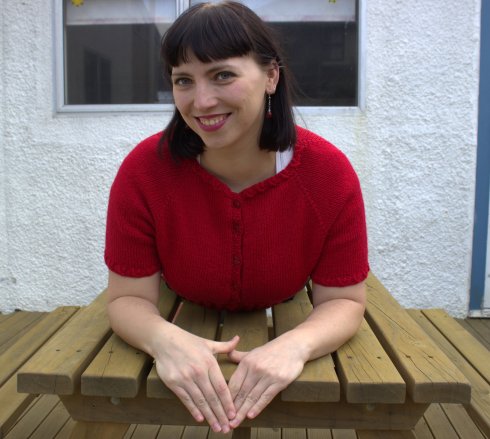
The final set of photos were taken the same time as the photos from my skirt remakes, so once again heaps of thanks to Jo from Making it Well for wielding the fancy camera and Grace from Miss la Belle for the posing tips. It was so much fun hanging out with these guys!

And because of Grace's and Jo's influence, here is my knitting-does-pinup pose.

And because of Grace’s and Jo’s influence, here is my knitting-does-pinup pose.

FO and MOS 6-7/52: turquoise and denim skirts remakes

11 Aug

Originally when I knew Mum was coming to stay for a week I thought “excellent, a day or two to finish my costume and then we’ll do heaps of other stuff!” Of course, that didn’t pan out… the costume took so much work! But we still squeezed in some other fun stuff while we were together.

One of the things I managed to do was to refashion two me-made skirts that have been sitting in my repairs bin since last September, when Mum was last staying with me and helped me do a serious wardrobe audit.

The first is an A-line skirt made from dark blue denim covered in an oxblood red velvet flocking. I made the skirt back in about 2002 (yep, over 10 years ago!) from Butterick 3220.

Butterick 3220

Butterick 3220

It was one of the first things I made for myself after years of making Mum sew for me and I was pretty pleased with it (although I don’t think I did the zip myself but I can’t remember who did!) But I didn’t wear it often and I didn’t know why. I finally figured out last year that the body of the denim meant that the A-line retained its A shape, as opposed to falling into fullness the way drapey A-lines do; and that the shape of the skirt standing out from my body did not please me. So I decided to peg it.

Doesn't really show how unflattering this was, largely because Mum took it at night and I was wearing all black with it and the light in my sewing room is awful. You'll just have to trust me that it wasn't good and several people agreed.

Doesn’t really show how unflattering this was, largely because Mum took it at night and I was wearing all black with it and the light in my sewing room is awful. You’ll just have to trust me that it wasn’t good and several people agreed.

First I tried the skirt on and pinned to mark the hip. Then I turned the skirt inside out, measured in from each side seam about 6 cm, and connected this in a straight line to the hip point with chalk.

Because the skirt was A-line, it had no vents or splits, so my plan was to convert the side seams into splits by simply not sewing my new side seam all the way to the bottom, and then cut the old side off, leaving an open seam at the bottom in which to make a split. I’d press the seam allowances flat on the split and top stitch over them. But I wanted to check the amount of taper before cutting off the excess but after sewing in my new seam lines. So I sewed the new side seam, following my chalk, to within a few centimetres of the bottom.

I put the skirt on and discovered something. Completely unintentionally, my new seam had turned the excess fabric at the hem into kick pleats! So taken was I with this that I decided to leave the kick pleats in place. I top stitched a line of angled stitching as is traditional in a kick pleat and trimmed off the excess seam allowance, and it was pretty much done! The only thing I decided to do was to add a row of tiny edge stitches to each pleat to make it nice and crisp, and the result was so nice that yes, I will go back and do this to my yellow skirt.

It’s still not really the ideal shape for my preferences, as I am still learning what I like on me, but now I have a new skirt with a nifty design feature that I’m happy to wear while I work on making things that are even better. And the first day I wore it to work, I got some lovely comments. I’d call that a win!

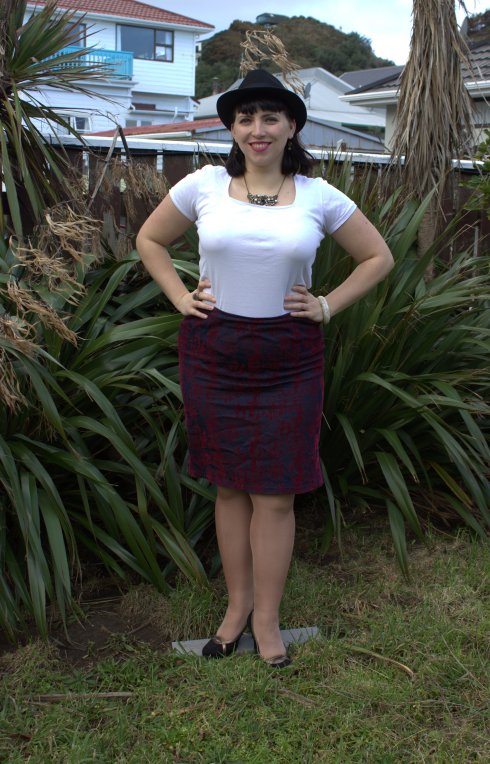
New and improved skirt. I'm standing on a bit of wood so my heels don't sink into the ground. Yes, I had to wear heels.

New and improved skirt. I’m standing on a bit of wood so my heels don’t sink into the ground. Yes, I had to wear heels.

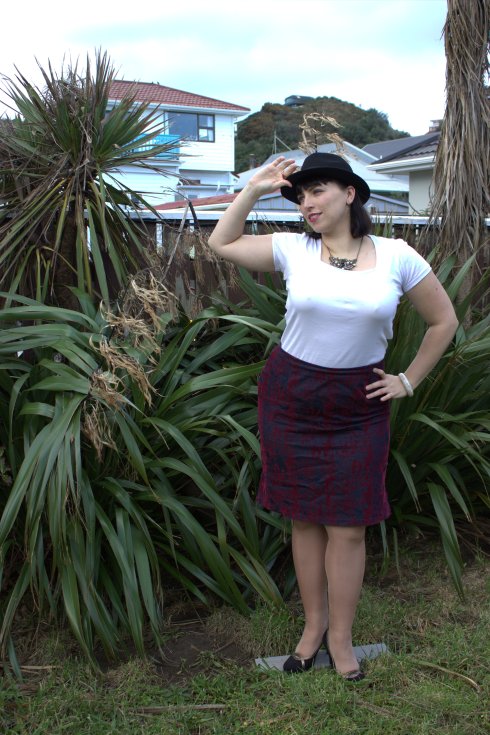
I like hats but I don't wear them often. I should wear them more.

I like hats but I don’t wear them often. I should wear them more.

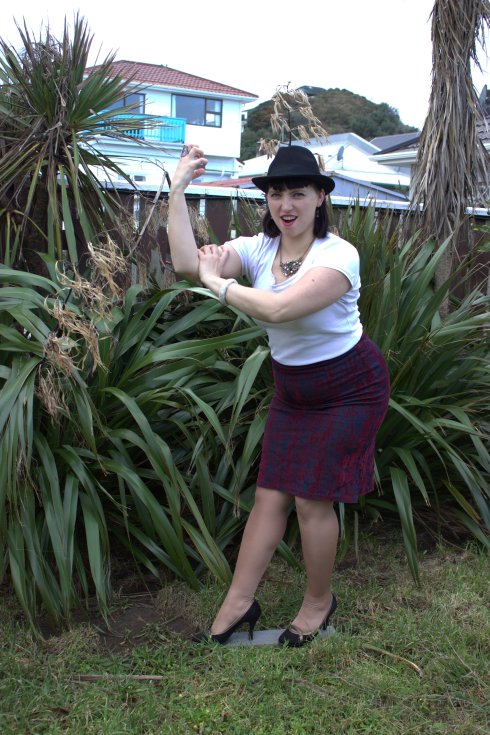
Trying some saucy poses. Hmm.

Trying some saucy poses. Hmm.

Nicely fitted through the seat.

Nicely fitted through the seat.

Drawing your attention to my unique kick pleats on my side seams.

Drawing your attention to my unique kick pleats on my side seams.

A close up of the kick pleat. You can see the original side seam forms one edge of the pleat and if you look really closely you can see the angled top stitching.

A close up of the kick pleat. You can see the original side seam forms one edge of the pleat and if you look really closely you can see the angled top stitching.

The second skirt was a straight pencil skirt that I made about three years ago from Vogue 8425 (View A) and wore it heaps. The pattern came together perfectly easily. I did toile it when I made it, and made some alterations to it but I can’t remember what they were! It was a fast and easy make and I will make it again someday. I’m also dead keen to do View C with that awesome built in belt thing.

But despite getting lots of wear out of it, I also decided in my wardrobe audit that I prefer tapered hems as more in keeping with my aesthetic and so this went into my repairs box for a spruce up.

Vogue 8425

Vogue 8425

It is made in a turquoise mystery fabric with a white slub. My awesome brothers gave me the fabric for my birthday in about 2005ish because they know I’m crazy about turquoise! At the time they were only about 12 and 10 years old, and they picked the fabric out themselves. It was bought from a shop that along with new fabric off the bolt sold fabric from deceased estates, which this one was, so I have no idea how old it is or what it is made from, but I do know my brothers know me well.

My attempt at a before shot. Also taken at night in bad lighting. Toughen up and deal with it.

My attempt at a before shot. Also taken at night in bad lighting. Toughen up and deal with it.

Another super easy fix! Because it was already a pencil skirt it had a rear vent, so all I had to do was take in the sides. To do so I marked my hip, mark my reduced distance at the hem, unpicked the hem at the side seam, connected in a straight line with chalk, and then sewed it in! A bit of hand sewing to re-hem the side seam and a favourite skirt updated to be even more favourite and released back into circulation.

And after, neatly pegged at the hem.

And after, neatly pegged at the hem.

I love this colour so am very happy to have this skirt back in rotation!

I love this colour so am very happy to have this skirt back in rotation!

Again, nicely fitted through the rear.

Again, nicely fitted through the rear.

Wellington wind and it's fine hair-helping best.

Wellington wind at it’s fine hair-helping best.

Like all things though, getting photos, especially in winter, is a hassle. Luckily as we ease towards spring we’ve been getting some great sunny days, and a couple of weeks ago I was lucky enough to host both Jo of Making it Well and Grace of Miss La Belle’s House of Burlesque for an afternoon of crafting and company. Jo had volunteered her amazing camera to take some photos of me, and Grace volunteered her superior experience in dancing and modelling to try and teach me how to stand so that I don’t look as much like a numpty in photos. Did it work? No idea. Did we have fun? SO MUCH FUN! Grace had all three of us giggling and carrying on as she directed the photo shoot. All photo shoots should be this fun!!!

When photoshoots go crazy. You should see the ones I didn't show you. Wait, that doesn't even make sense.

When photo shoots go crazy. You should see the ones I didn’t show you. Wait, that doesn’t even make sense.

This one is actually one of my favourite photos!

This one is actually one of my favourite photos!

I am so pleased with my two “new” skirts! Now to tackle the approximately one gazillion other remakes and repairs in my repairs box…

MOS 5/52: I get my Moxie (or, my burlesque debut)

4 Aug

Of course, now you desperately want to know what the other Enormous Project was that took up all of my time over May and June, right? Well, I’m going to tell you anyway, so you might as well pretend.

I should warn you – this is long, detailed, and picture heavy.

Now, the observant amongst you might remember that I signed up to do burlesque classes (again) back in Feb. I’ve done the classes before, but always for my own benefit, with no intention of taking to the stage. But Miss La Belle offers a level 3, where students who are interested work on their own acts before appearing in a student showcase produced by Miss La Belle. I’ve never had any particular desire to appear on stage (actually, I have deep seated performance anxiety and stage appearances tend to reduce me to a whimpering shaking mess) so I’ve never done that. But… for a bunch of reasons I decided that this time, I would do it.

Yep, I would choreograph, costume, and perform my very own burlesque act in the June 2013 Miss La Belle’s House of Burlesque Frolic Lounge show.

Over the course of about 11 weeks.

And the show was one week after the market that I was making all the cushions for.

WHAT WAS I THINKING!

Once I realised that Mum was coming to stay for a week, I decided to take that week off work. And as it was the week between the market and the show, I decided to leave most of the costuming for that week so that my AMAZING mother could help me out. Because it’s every mum’s dream to help their daughter sew their debut stripping costume right? (Have I mentioned my mum is awesome?)

I am SO lucky Mum helped me. I wouldn’t have had a dream of completing both of my Two Enormous Projects without her. Knowing I had a week off available to complete my costume meant I could spend my free evenings and weekends before that time making cushions and rehearsing the routine and working on the basics of the costume, knowing all the complicated fitting and pinning bits could come later.

But even with leaving most of the tricky bits till the last minute, I still worked on my costume, juggling it around cushions. Because, you see, burlesque costumes have a lot of parts. There are layers upon layers of bits, and many of them have to be removable which adds new complexities. Not to mention the embellishing!

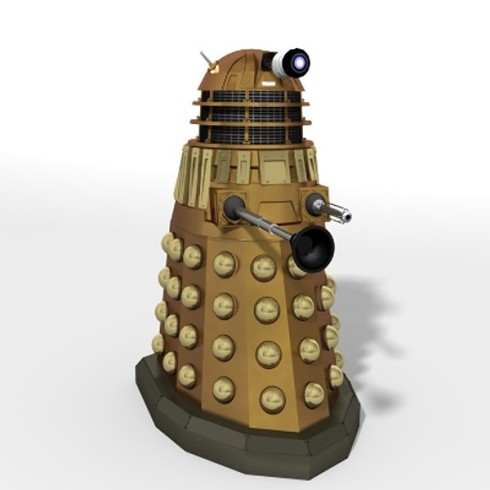
My concept for my routine was one I’d had ages ago. Being in the burlesque community, even as a non-perfomer, you see things or hear things or think things and go “oh, that’d be a great act!” And one day as I was watching Dr Who fight the daleks, I was looking at the funny little dalek arms and I thought “Oh, that’d be a great act!” Yep.

A dalek, the most famous of the villains in Dr Who, renowned for their desire to "Exterminate" all of humanity! Instead of arms they have two limbs, the death ray and the manipulator arm, often known as the egg whisk and the plunger.

A dalek, the most famous of the villains in Dr Who, renowned for their desire to “Exterminate” all of humanity. Instead of arms they have two limbs, the death ray and the manipulator arm, often known as the egg whisk and the plunger. Pinched from Google.

So when I decided to actually perform, naturally I decided to turn my boobs into dalek arms.

A key part of burlesque is nipple covers, known as pasties. Pasties can be simple or elaborate, beautiful or hilarious, but they’re always a key part of the costume. But despite the variation they’re pretty much always flat enough to fit under a bra. So how on earth was I going to (a) attach around 20 cm of projecting objects to my boobs, (b) make them stay there, and (c) hide them in my costume?

Yep, I not only had to choreograph and costume, I had foolishly chosen a concept that included some pretty major engineering.

There was much thinking and pondering how I would achieve these aims. There were thoughts of finding old radios and using the telescoping aerials in the middle of the pasties, so I could extend them. Lots of people suggested using something with some sort of spring tendency and strapping them down, so when the strapping came off they would sort of sproing right into shape. I thought about making the first layer of my costume a TARDIS so that I had a reason to wear something that wasn’t form fitting that I could hide by appendages inside.

In the end I settled on leaving them onstage in a box and velcro-ing them onto regular pasties at the appropriate point in time.

So, what could I make an imitation plunger and egg whisk out of that would be strong enough to hold their shape and light enough to remain parallel to the floor when they were held up solely by glue, velcro, and my naturally perky breasts?

I bought some supplies from Made on Marion but my original idea, to use dowelling, was a bust. To be light enough to be supported by my boobs, the diameter meant that there was virtually no surface area for adhesive. Mechanic Man suggested using cardboard, so I could cut little support struts into it. But before I could try that, the always amazing Miss La Belle magically produced just the right stuff. A thick layer of pliable foam with silver foil already adhered. Cut and rolled into a tube, and sealed with adhesive aluminium tape, I had the basis of my pasties in place. I made the rest out of pipe cleaners, cardboard, and tinfoil. Oh yes, it was one macaroni piece away from being a pre-school project! It’s amazing what you can get away with on stage.

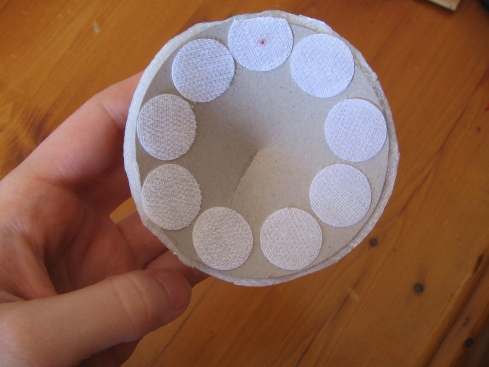
These are pasties, that are adhered onto your nipples in a variety of ways. For the record, I used spirit gum. Normally they're heavily and beautifully embellished, but mine have velcro dots..

These are pasties, that are adhered onto your nipples in a variety of ways. For the record, I used spirit gum. Normally they’re heavily and beautifully embellished, but mine have velcro dots…

...that matched the velcro on the underneath of my feature pasties. This was to ensure that I could slap these things on mid routine and they'd stay put!

…that matched the velcro on the underneath of my feature pasties. This was to ensure that I could slap these things on mid routine and they’d stay put!

The feature pasties! Featuring pipe cleaners and tin foil.

The feature pasties! Featuring pipe cleaners and tin foil.

Once that was made, I still had the rest of my costume to go. In burlesque, there is often a transformation in a reveal (reveal being a burlesque phrase for revealing plot elements, costume, or skin by removing a piece of clothing or moving a prop). I  decided to start as Doctor Who and transform into the dalek.

Now, I wasn’t cosplaying, so supreme accuracy was NOT the name of the game. I decided that the most recognisable Doctor Who costume of all time (feel free to disagree) was Tom Baker’s Fourth Doctor’s striped scarf.

The Fourth Doctor's iconic, super long (12 to 14 feet), striped scarf. And look, daleks! Pinched from Google.

The Fourth Doctor’s iconic, super long (12 to 14 feet), striped scarf. And look, daleks! Pinched from Google.

I decided that I wanted at one point for my costume to be nothing but the scarf. So how does one turn a scarf into a dress?

I bought five different colours of polyester satin that tied roughly into the original colour scheme and cut it into different width strips, then sewed them together in a random order to create a striped satin scarf, finished width about 80 cm, finished length about 2 metres or so. It took me ages to cut all that satin and sew it all together! (On a side note, polyester satin frays like nothing else. When you have 5 metres of it cut into about 50 strips, that is a LOT of raw edges. I was pulling polyester thread furballs off everything I owned for days. There’s still some embedded in my carpet. Today I found some in a pillowcase, after I’d washed it.)

My awesome Mum hemming the long edges on my scarf dress

My awesome Mum hemming the long edges on my scarf dress

I experimented with a few different ways of wearing it, but what I settled on was having the scarf run up the front of my body, loop loosely around my neck once, and then run down the back of my body, with snaps on either side to shape it to me. I could rip open the snaps to whip the dress off .

Part of my striped scarf dress, showing the snaps that convert a rectangle into a me-shaped dress

Part of my striped scarf dress, showing the snaps that convert a rectangle into a me-shaped dress

A shot from one of the fittings of the scarf dress. If you look closely you'll see where it loops behind my neck, and the edges of the front of the scarf snapped into place along my sides

A shot from one of the fittings of the scarf dress. If you look closely you’ll see where it loops behind my neck, and the edges of the front of the scarf snapped into place along my sides

In between the scarf and the pasties though I still needed another layer, and I settled on a metallic silver bra, underbust corset, and a-line skirt. The underbust corset and skirt would remain on for the final reveal, to become the dalek body. I settled on making the skirt from scratch but covering an existing bra and corset.

The skirt was one half clever drafting, one half pure luck. I used a super stretchy metallic foil covered knit to make the skirt, corset, and bra. I decided on a simple A-line, elastic waist, no darts or shaping required due to the knit. I decided the width of my skirt waist should be equal to my actual hip measurement so I could get it over my hips and then drew identical triangles to use for front and back, extending from my waist width to my desired hem width, and cut a rectangular stip to use for a casing for the elastic. But when halving my desired finished waist width in order to draft my pattern, either Mum or I had a moment of stupid (she swears it was me, I reckon it was her!) and halved it wrong, making the waist too small! Amazingly, it ended up being the absolute perfect size, the stretch in the fabric means I can get the skirt over my hips and the fact it is smaller than we intended gives it a sleeker finish at the waist, with much less gathering.

I cut it to length by bending over and Mum estimating how short I could get it and still cover my butt, and I didn’t bother with hemming it.

Simple A-line silver skirt

Simple A-line silver skirt

The corset was a bit trickier. I had a white cheap, plastic boned, not-really-a-corset corset as I wasn’t up to making a corset from scratch, and we stretched the silver foiled knit over the top of it, stitching it in place. Mum cleverly figured out how to fold extensions in the cover to hide the busk and grommets, but leave space for the ribbon to come out. I replaced the white ribbon with grey.

The covered corset. The silver fabric stops before the sticky out bits of the busk, but extends on the other side to cover the busk once done up.  Unfortunately my camera doesn't really give you the full effect of how SHINY this stuff really is!

The covered corset. The silver fabric stops before the sticky out bits of the busk, but extends on the other side to cover the busk once done up. Unfortunately my camera doesn’t really give you the full effect of how SHINY this stuff really is!

Inside the corset, showing all of the hand stitching Mum invested in it. The right hand side shows the loop bits of the busk hiding behind their cover.

Inside the corset, showing all of the hand stitching Mum invested in it. The right hand side shows the loop bits of the busk hiding behind their cover.

The back of the covered corset, no white fabric or eyelets on display

The back of the covered corset, no white fabric or eyelets on display

The flap over the eyelets on the back of the corset, hand stitched between each eyelet for security but allowing the ribbon to extend out.

The flap over the eyelets on the back of the corset, hand stitched between each eyelet for security but allowing the ribbon to extend out.

The bra was perhaps the hardest thing to make. I stretched and manipulated the foil knit over the cups of a moulded bra, then carefully stitched it in place in the inside. I didn’t dart or shape the knit, just manipulated as much as possible. The cover is marginally smaller than the bra itself, meaning the bra collapses a little when empty, but when filled with what a bra should be filled with, the knit stretches into a pretty smooth surface. Once it was stitched in place, Mum trimmed the excess fabric back and did a second row of hand stitching around the inside of the cups to keep the folded over fabric lying flat.

The front of my dalek bra. It is less wrinkly when appropriately filled.

The front of my dalek bra. It is less wrinkly when appropriately filled.

The inside of the dalek bra, showing all of the painstaking hand stitching that keeps it covered.

The inside of the dalek bra, showing all of the painstaking hand stitching that keeps it covered.

For the gore (the little bit between the cups) I carefully cut the oddest shaped little piece of fabric and wrapped it around, hand sewing it all neatly and covering the edges of the cup fabric.

Hand sewing onto the bra was super hard work as the bra was moulded so very thick. I used my thimble heavily, but not being a thimble user I was awkward and slow.

After covering the cups, I had to cover the back band. Now, how to do this without losing the stretch inherent in the bra?

Enter Mum and her belly dancing costuming experience. This was so amazing to watch I have to share it with you.

First, I put the bra on and Mum DREW the shape of the band onto my back. Honestly. Here’s proof.

Not a photo I ever thought I'd put online.

Not a photo I ever thought I’d put online.

Mum then transferred this onto paper by tracing it off my back, and then cut two out of the foil fabric for each side, carefully marking where the shoulder strap extended. She machine sewed the bottom and the top up until the point of the shoulder strap then bagged it to make a band shaped cover.

She slipped this over the band, and hand stitched the top between the shoulder strap and the cup, then stitched the edges to the cup front and back.

Confused? These pictures might help. This method results in the band being covered with a tube that is longer than the band when it is off, but the perfect size when the bra is on and the band is stretched.

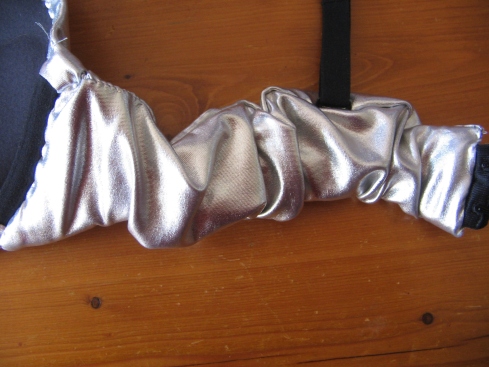
front of the fully covered bra band, all wrinkled up.

Front of the fully covered bra band, all wrinkled up. The little bit of embellishment was to cover the bit of band that couldn’t be covered as the hooks are underneath

Inside of the fully covered dalek bra band, showing the cover all wrinkled as the strap is not fully stretched.

Inside of the fully covered dalek bra band, showing the cover all wrinkled as the strap is not fully stretched.

The silver layer, pre-embellishment. Over my merino tights because it was damn cold that week!

The silver layer, pre-embellishment. Over my merino tights because it was damn cold that week!

After my bra was covered, I had to embellish it. I considered all sorts of sequins and beads and fringing, but eventually settled on minimal embellishment – I mean, I was wearing an outfit with the reflective value of the sun;  I decided it didn’t need much.

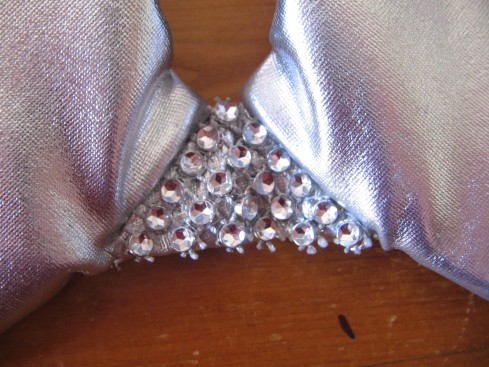
Mrs C has, in her shop, a plastic stuff that is a gridlike mesh of faceted sparkly surfaces. I added a triangle of this to the gore. The straps were tricky – like the band, they need to be stretchy so sewing or gluing anything on would reduce that. I settled for cutting the mesh down into pairs and hand sewing over the centre of each pair. By anchoring in only one place, I kept the straps’ elasticity.

The embellishment on the bra gore. This stuff is amazing. Go buy it from Made Marion.

The embellishment on the bra gore. This stuff is amazing. Go buy it from Made Marion.

The little bits of mesh sewn onto the strap

The little bits of mesh sewn onto the strap

So that was my costuming feat. All in all, I had to make: two base pasties, two dalek feature pasties, one silver bra, one silver underbust corset, one silver skirt, and one striped convertible scarf/dress. At the same time as I was making a squillion cushions. While also choreographing and rehearsing the act. WHY DID I DO THIS TO MYSELF?

Thank goodness for Mum. She was amazing. She helped me make the skirt, she painstakingly handsewed the fabric onto my  corset while I started handsewing the covering on the bra, she then finished handsewing the covering on the bra, she completely designed and handled covering the back bra bands, she hemmed all four sides of my scarf-dress, and she handsewed all the snaps onto my scarf-dress, while I wore it. Yep, I stood there with my hands in the air while she knelt at my side and sewed snaps onto my dress, as it was the only way we could get them in the right place to ensure a good fit and the right shape. We did this last task about 4 hours before I had to be at my hair and make-up call for the first show. She was an absolute trooper, creative genius, and emotional support, and she totally saved my ass. I LOVE YOU MUM!

The show rolled around on the Friday and Saturday night in the middle of worst storm to hit Wellington in something like 40 years. But the show must go on, and go on it did! The lovely Claire of The Vanity Case did my hair for me using star clips I made at Mrs C’s suggestion, I slapped on enough makeup and false eyelashes to be mistaken for a drag queen (entirely intentional, those girls know how to do stage make up), got kitted up in all of my many costume layers, added my coat and hat (two things NOT made by me, hurrah!) and then proceeded to take half of it off in a room full of people. Who’da thunk it.

Unfortunately, due to the somewhat awkward nature of my costume (I couldn’t move too much for fear of busting my snaps open, and the coat was too hot to wear backstage until right before I went on), I have no posed snaps in full costume. What a doofus brain I am! Two nights and never managed to get snapped while posing, in full make-up and costume. Sigh.

So you’ll have to settle for what I’ve got, shots from me mid-act.

The coat layer of my act. I've already tossed the hat aside, but there are no photos with the hat on that aren't super blurry

The coat layer of my act. I’ve already tossed the hat aside, but there are no photos with the hat on that aren’t super blurry. You can see how the loop on the front of the scarf dress sits over the coat, to make it obvious I am wearing the Dr’s scarf under the coat. Photo courtesy Jon McGavin

But wait, it's not a scarf, it's  a dress! You can see the cowl effect I used to put over the top of the coat.

But wait, it’s not a scarf, it’s a dress! You can see the cowl effect I used to put over the top of the coat. Photo courtesy Jon McGavin

Wait, now its a scarf again!

Wait, now its a scarf again! Photo courtesy Jon McGavin

Hard to get a non-blurry photos of a shimmy

Hard to get a non-blurry photos of a shimmy. Photo courtesy Jon McGavin

Getting ready for the transformation into a dalek. And look at the cute star clips in my hair!

Getting ready for the transformation into a dalek. And look at the cute star clips in my hair! Photo courtesy Jon McGavin

As for the dalek pasties… well, you’ll have to wait until I next perform and come and see it for yourself! (Hey, some things I don’t want to put online!)

I had an absolute blast and got so much positive feedback afterwards that I positively buzzed for about a week. And who knows, I might even do it again! It was a pretty big moment, and certainly counts as one of my creative Moments of Satisfaction. In fact, I could probably count it as several, but as it was really just one large project, I’m counting it as one.

I know you’re all desperate to know the answer to the question I posed last time – what stage name should I use? So, let me introduce you to Moxie Fizz… she sparkles, she effervesces, and she needs all the moxie she can get!

And even more importantly, what did I dance to?

Well, this of course!

Burlesque – yet another love of mine

22 Feb

A couple of years ago, motivated by my interest in corsets and glamour and girliness and my curiosity about dancing, and encouraged by the irrepressible MrsC and her desire to vicariously live out her own frilly knicker desires, I signed up to a burlesque class run by the fabulous Busty La Belle.

Miss La Belle

Miss La Belle’s House of Burlesque

I instantly had the biggest girl crush on Busty La Belle (now mostly known as Miss La Belle due to Facebook’s refusal to allow her to have Busty as a name). She was playful and funny and confident and her eyes sparkled and she was only not smiling when she was laughing and she laughs a lot, an infectious laugh that makes the world better. I instantly decided I wanted to be just like her when I grew up.

I enjoyed her classes so much. Her 6-week level 1 class, which focuses mainly on posing and strutting and looking confident, with some glove removal and a little bit of extra in the last week for those who want, was So Much Fun I did it three times in a row. Then she released a level 2 class, which included stocking and robe peels, small props like fans and boas, and bra peels. I did that and loved it too. Then she hosted a tassel twirling class, and yep, much to my own shock, I did that too! Then we were asked if we wanted to perform on stage and I said no. About half of my class went of to take the stage in Miss La Belle’s first graduation show, Frolic Lounge, and one or two have since gone on to be local starlets.

I didn’t perform because I didn’t start burlesque out of an unfulfilled desire for fame and stage time, but a desire to play with pretty things, but also to do something different and challenge myself.

And I did all of those things, and loved it. I discovered a whole new approach to body positivity that I could rave about for hours (and might in its own post one day when I’m feeling particularly in the mood for a feminist rant on society and beauty), thoroughly improved my relationship with my own body image, and improved my somewhat lacklustre social confidence. I discovered an entire community of lovely women and made a couple of great friends. I discovered these things called vintage and pin-up and rockabilly and realised they were the words to capture things that I already loved but didn’t know about. I took on my lifelong terror of photos by booking in for a pin-up photo shoot. I discovered a new love of burlesque and go to as many shows as I can afford, and enjoy them immensely.

One of my favourite shots from my fear-busting photo shoot

One of my favourite shots from my fear-busting photo shoot

Busty La Belle remains my favourite performer because she is beautiful and confident and witty and captivating. I was very very lucky that over time the woman behind Miss La Belle became a very special, very dear friend. She truly is a remarkable woman and being around her still makes me want to be her when I grow up. As I can’t be her when I grow up (grumble), I’m thinking about how I can learn from the things I love about her and apply that to myself. She makes me want to be a better person. She makes me want to be playful and open minded and confident and strong and happy and do it in red lipstick and curls. I’m not sure I’ll ever attain her stellar levels of confidence (of her mastery of faking it, whichever) but she gives me something to aspire to.

Miss La Belle, naturally beautiful and glamourous

Miss La Belle, naturally beautiful and glamourous

This year, I decided to relive the glory one more time and am repeating level 1 and level 2 simultaneously. And it is still So Much Fun! I still feel like a graceless duckling standing in adoration of Miss La Belle’s swanlike glory, but every time I go there I laugh, non stop, for an hour, listening to her hilarity and watching her amazingly expressive face run the gamut of every type of happiness, cheekiness, sauciness, and delight known to humankind. And who knows. Maybe, just maybe, I’ll decide to perform on stage, just once, just for the hell of it. Once you’ve taken your clothes off in public, surely other life challenge’s get easier!

If I do, you can be sure all the costuming details will go here! It’s amazing what you can make with a cheap bra, a glue gun, and a metric crap tonne of sequinned trim.

And in the meantime… I need a burlesque name! I’m open to suggestions!

Finished object: the skull and roses dress

11 Oct

My skull and roses dress makes me happy. It brings together three of my favourite loves – 1950s style dresses, rock and roll dancing, and a little bit of subversion! And it is associated with so many happy memories!

Miss La Belle and I both got dolled up in 1950s style for the ball – except Miss La Belle set and styled her own hair and I got mine done! None of the photos show very well the victory rolls I had though, disappointingly

I started learning rock and roll dancing in June 2011 with Feet with Heat, and in September was the annual ball and show. Ooh how I wanted a fancy dress to wear! I wanted to turn up to that party looking as hot as I possibly could.

So I did what all women in such situations do – I agonised over decisions with my dear friend, MrsC of The Hectic Eclectic. We settled quickly on a great pattern, and then MrsC enabled my print addiction introduced me to eQuilter, a fabulous site for craft cottons in amazing prints. After emailing options to each other, I eventually ended up surfing the site with her on her couch before buying four different subversive and funky prints to choose from when they arrived. (For what it’s worth, I have never had any problems making beautifully handling dresses from craft cottons.)

While I anxiously waited for my fabric to arrive, I made a mock-up of the bodice. MrsC, being both a dear friend and my colleague (before she quit to open a craft haven) pinned me into it in the ladies’ room at the office. I went through three versions of the bodice before I was happy. At the time we were under the opinion that I am quite broad across the back so MrsC suggested cutting the back one size larger than the front. But I ended up having the make the back significantly narrower and move the strap placement a lot further towards centre back, as well as deepening the front darts to increase the fit under the bust. Thank goodness for mock-ups! (We’re now contemplating the opinion that I am regular through the back but broad through the shoulders. I have to figure out properly how this impacts my fitting.)

Fuzzy, grainy, low-light picture of me and the dress in action at the ball. The polka dots on the edge are Miss La Belle also getting some dance floor time.

Finally the fabric arrived from its long and arduous trip across the globe. On the Monday before the Saturday night ball. EEEEK! There was no way to get it made. For a start, I’m not a very competent sewer (yet) so tend to take my time. Secondly, I had several nights of classes that week to make sure I was as dance-fit as possible for my first night out social dancing. I didn’t want to give up the dance classes to make a dress to wear to the event that the dance classes were for! So I settled on my back-up plan, a regular dress out of my wardrobe.

But I have EXCELLENT taste in friends! MrsC, upon seeing my dilemma, did the most awesomest thing in the whole world. She offered to make the dress for me! She took the fabric home on Monday night, along with my carefully re-drafted pattern, and came back in the following day with a bodice. We had to make some additional tweaks to the darts, but the overall placement and height was right so that was not a big deal. Finally, on Friday, a mostly-complete dress came to work. All I had to do was put in the invisible zip into the side seam (MrsC not being a fan of them) , finish the shoulder seams and the contrast band with a bit of slip stitching, tack the bodice lining down, and hem the sucker. So I got to work on Friday night and worked solidly through Saturday. At 2pm I was pressing the last of it, just in time to race into town for my vintage hair-up appointment. (I have yet to master the art of victory rolls or other snazzy looks!)

I made it to the hair appointment just on time, got back home with just enough time to meet up with the lovely Miss La Belle and slap on my makeup and false eyelashes, pull on my petticoat (another MrsC wonder), and arrive at the ball fashionably late – just in time for dinner to be served.

Cropped from another terrible photo of the dozen of us still going at 1am when the venue tossed us out. It’s a terrible photo but look! I have a cleavage!

The dress performed amazingly well that night, fitting me perfectly and comfortably and most importantly swirling wonderfully! I love that it gave me a subtle improvement in my normally lacklustre cleavage! And I especially love that several people had to do a double take when they realised that there were cute wee skulls and crossbones peeking out from behind the roses. Hehe.

From the retro cheesecake pin-up shoot, used courtesy Toya of Digitalpix

Unfortunately I have very few photos from the ball, and as you can tell, none of them are very good! But there are plenty of it in action at my first rock and roll competition. But I was lucky enough to be invited by another dear friend, Sadie von Scrumptious of Ever So Scrumptious to participate in a retro-kitchen-cheesecake-pin-up photo session early this year, along with the amazing Miss La Belle and the fabulous Winnie Chester, with pictures taken by the extraordinary Toya of Digitalpix. As explained, I have a history of avoiding cameras, so I decided last year to take that on by getting as many pictures taken of me as I can, and learning to like them. I’m succeeding in getting more photos of me taken, but only slowly progressing towards liking them. A natural model I am not! But it was wonderful fun and I am so grateful to this fabulous collection of women to have them in my life and to get to participate in this day and have these pictures to commemorate.

Cheeky! It’s amazing what mischief one gets up to with Miss La Belle’s encouraging voice in the background! Image used courtesy Digitalpix

Vital statistics…

Vogue 2902

Pattern: Vogue 2902
Year:2006
Fabric: Alesander Henry craft cotton from eQuilter – bought especially for this project and used straight away, shock horror!
Notions: invisible zip
Made: September 2011
Techniques used: inserting an invisible zip into a side seam
Time to complete: for me, not much. Thanks MrsC! Even so, there’d be a few hours in the mock-ups and the hem. So much hem.
What I learned: I have awesome friends. I still don’t know how my back and shoulders affect fit. The internet is great when it comes to things like putting an invisible zip into a side seam. How to put an invisible zip into a side seam.
Wearable? It was my go to dress for rock and roll events, until this year’s ball and this year’s dress. I haven’t figured out how to wear it socially/casually without feeling a bit weird. I intend to fix this.
Likeability: Love it. Love it.
Unsolicited comments: frequently. And I won best dressed at a dancing competition in it too!

Rock and roll – how I got my groove on

1 Jun

It turns out I’m a bad blogger. This is not surprising! But nonetheless, it is a little terrible that this story has sat waiting to be told since February.

I started rock and roll dancing about June or July in 2011 with Feet with Heat and instantly was hooked. I could see I’d finally found my “thing” and decided that I wanted to do as much as I could! Unfortunately my partner G would rather (insert painful metaphor) than dance, so I went alone, but going any further than just dancing in class requires a partner. I was really lucky to meet a guy at dancing, D, who is fun to hang out with and fantastic to dance with, and we decided within a few weeks that we should have a few practices and see if we could get any better.

Me and D at Feet with Heat ball 2011

Me and D at the Feet with Heat ball 2011, where we danced up a storm with each other and the rest of our studio

Come early this year, our dance teacher decided that D and I were doing ok and should enter a small dance competition held as part of Rockin’ the Hutt, a street festival and fair in Lower Hutt, Wellington, on February 26th.

Now, I should explain that I do performance anxiety poorly. Or well, depending on your point of view. Anything that involves being watched, assessed, or judged turns me into a dithering mess. So it was with trepidation and a huge amount of personal development that I agreed to this craziness! But D was keen and supportive and I knew that we’d have fun so I signed up.

Of course, once the paperwork was done the important thing was what I was going to look like! I wore my skull and roses dress (yet to be blogged about) and arranged people to do my hair and makeup. Claire of The Vanity Case and Miss La Belle of Miss La Belle’s Hair Pretties were sharing a stall in the market selling Besame vintage makeup, vintage hair styling, and handmade hair flowers and pretties. So at 9 am I got my hair and make-up done sitting on a stool in the middle of the street!

Claire of The Vanity Case doing my hair in vintage victory rolls

close up of hair and fascinator

One of Miss La Belle’s psychobilly hair pretties, a skull on a butterfly, the perfect complement to my skull and roses dress! And yes, I am going to add a strap keeper to the dress. Photo credit: Julian Thomson

The wonderful Mrs C had also decided that D needed to coordinate and kindly made him a tie and pocket handkerchief that matched my dress. He looked great.

Walking the ring for the best dressed competition

D and I walking the ring for the Best Dressed competition. Check out D’s matching tie and pocket handkerchief. The handkerchief is made from the same cotton as my contrast band and has a tiny skull appliqué on the corner!

D and I competed in the rock and roll open (where you are judged as a couple), entered individually in the jack and jill (where you dance with lots of partners and are judged individually) and entered best dressed.

Dancing action shot

A bit of petticoat showing. Thank goodness for my slip! Photo credit Julian Thomson.

dancing action shot

D and I mid turn. Love how the skirt flares. Photo credit Julian Thomson

We also got lots of social dancing in between different competition rounds, trying to keep up with the wild rock and roll tunes spun out by Wellington’s own X-Ray Cats.I was a nervous wreck just before the open section, but D distracted me with kind words and bad jokes, and we made it through the competition without falling off the dance floor, which was a raised stage set up in the middle of the street. That was my main concern so I was happy!

Social dancing action shot

Social dancing with D’s dad, D in the background. The dance floor was busy! Phot credit Julian Thomson.

Social dancing action shot

Another gratuitous dancing shot. Photo credit Julian Thomson

The X-Ray Cats getting into the moment

Finally, at the end of the day the results were announced, and to my delight, we did well! D and I were shocked and thrilled to find we came third in the rock and roll open, and we now each have an actual medal hanging on the wall. I was even more shocked to discover I came second in the follows in the jack and jill. And to top off the day, D and I won best dressed competing couple, meaning we each got a tidy sum to put towards dance shoes from Kanikani shoes. I love my new dance shoes.

Triumphant best dressed winners and dance placers!

Not a bad start to competitive dancing! And just like that I was hooked. Since then D and I competed in a small club competition in Whanganui, on very short notice, where we surprised ourselves by coming 5th in a field of 7, which was very exciting as we were the only couple freestyling and not doing well-rehearsed routines.

Coming into cuddles, a great move. Skirt me-made and to be blogged about. Photo credit Julian Thomson

Coming out of sliding doors, another neat move. Photo credit Julian Thomson

And to top it off, on Sunday just gone, D won the leads in the rock and roll Jack and Jill organised by our studio and held at the Southern Cross bar. And I won the follows!

I’m still an absolute bundle of nerves before every event but I see this as a great way to do something I love and overcome a personal limitation. And who knows where to from here? There will be more to follow!

Finished object: pink polka dot circle skirt

20 Mar

My first completed project post! I’ve been held up on posting by a lack of pictures of me posing prettily-ish in any of my finished works. But I’ve decided to plunge ahead with this post with only action shots and see how it goes. If I get around to getting some appropriate posed photos, I’ll add them in!

Pink polka dot skirt

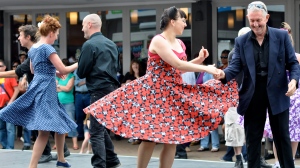
Me and the pink polka dot skirt on the dance floor

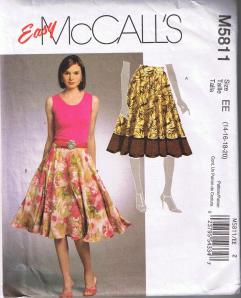
McCalls 5811Pattern: McCalls 5811
Year: about 2010
Fabric: cotton sateen with a small percentage of spandex, in stash for about 6 months
Notions: zip, trouser hook
Made: Finished March 2011, started not much earlier (a fast make for a change!)
Techniques used: lapped zip, slip-stitching waistband
Time to complete: A couple of hours maybe?
What I learned: doing something for a second time makes it easier. I can do lapped zips afterall – and YouTube is your zip techniques friend.
Wearable? Worn as often as I can get away with it! But it’s not on high rotation as I have a theory that really identifiable garments shouldn’t be worn out all the time – otherwise people will think I don’t have any other clothes!
Likeability: I love it! 10/10
Unsolicited comments: “You look like Minnie Mouse.” Hmm, not sure about that one. But I get lots of other lovely comments, and my favourite was “you look like happiness.” Aww

This is my second circle skirt. My first circle skirt has dropped (despite being hung) and needs to be re-levelled and hemmed so I’ll post about that skirt (and more about actually making a circle skirt) when it is re-finished. Grr.

Circle skirts are already easy to make and being my second, this one came together in a cinch for a nice change. The heavier weight cotton was easy to work with and the project seemed to fly by. I did my first lapped zip in years (my last few zips have all been invisible zips) and even that turned out perfectly fine with no hassles, thanks to a quick refresh with the help of Google and YouTube. All in all it was a pleasant sewing experience!

I love circle skirts! As well as being easy to make, they are so much fun to wear, and (at least I think so) very flattering. And I love dancing in them! I do rock and roll dancing (at beginner level) and there are lots of twirls and spins, and circles skirts are the finishing touch needed for such frivolity. Of course, such spinning and twirling shows one’s knickers quite a lot, so before I debuted this skirt, MrsC at the Hectic Eclectic helped me make a ruffled, super froofy petticoat with built in slip, and did a great tutorial on it here.

The dance studio I go to for rock and roll (Feet with Heat) had their Christmas party and medal presentation in December 2010. I went with my dear friend Miss La Belle, wore my polka dot skirt and had a blast!

Me and Miss La Belle

Miss La Belle and I get a photo on the way into the party. My knees are bent as I am a lot taller than Miss La Belle (due only to my stomping heels) and the photographer needed our heads at the same height!)

Me, and the skirt, in action.

Pink polka dot skirt in action

Just starting or finishing a spin, with the skirt at almost full altitude.

Not the most graceful set of photos but they do show the skirt in full flight!

Pink polka dot skirt in action 2

More spinning!

The top is from a clothing swap, but I love it with its great flutter sleeves so may take a pattern off it one day.

Pink polka dot skirt in action 3

It's all about the spins!

Earlier in that day, I did something amazing, at least for me. I did a dance exam. Yep, I sat the beginners level dance exam for rock and roll. This is amazing if you knew my reputation (poor) for having any level of coordination, combined with my abject terror of any form of exam. For rock and roll the beginners exam is called a bronze medal test and if you pass, you get an actual medal. It isn’t quite as scary (and therefore cool) as it sounds though. The exam consists of one minute slow dancing and one minute fast dancing, with my teacher as my partner. But I shook like a leaf before, during, and after. I have to admit I didn’t wear my circle skirt for the exam – I didn’t want the examiner to think that I thought I was all that and mark me harsher for it, so I wore my birdie bridesmaid’s dress, still to be posted.

Not only that, but in between my medal test and the party, I did something else amazing, at least for the camera-shy me. A retro kitchen pin-up shoot, in my skulls and roses dress! I’ll post pictures from that when I do my skulls and roses dress post.

All in all a great day featuring a great skirt. Roll on more of my new wardrobe!

All photos courtesy of Julian Thomson