FO: Cat lady sewing challenge top

8 Nov

Who doesn’t like a great sew along or sewing challenge! Well, actually, me. I participate in very few of them (outside of WSBN ones!) as it doesn’t tend to work with my creative process, although I love looking at the results.

But there’s this great blog out there called Miss Crayola Creepy and Erin came up with the great idea of a Cat Lady Sewing Challenge – make something with some form of cat reference in the fabric print. Cat sewing!!! Now there is something I can get behind! I knew INSTANTLY what I was going to make too.

My blue leopard print bustier top, for the Cat Lady Sewing challenge

My blue leopard print bustier top, for the Cat Lady Sewing challenge

But this is not that garment.

This is a garment I started in January, also inspired by an animal sewing challenge, Jungle January led by the truly brilliant Anne of Pretty Grievances and whose origin goes all the way back to last November and Sophie-Lee of Two Random Words and this pencil skirt.

Sophie-Lee and I both eyed up this blue leopard denim at Arthur Toye’s closing down sale (sniff) but I decided to refrain. Sophie-Lee went ahead and made that gorgeous skirt, but had about 80cm left over. We were chatting about what to do with it and I suggested that .8m was just enough for a bustier-style top. Sophie-Lee loved the idea but decided she’d never wear a blue leopard bustier and offered me the fabric so that I could do it, so very kind of her.

Fast forward to Jungle January and I decided it was the perfect time to make my leopard bustier, from Butterick 5680, a great ’80s pattern.

I used View C, the blue bustier top middle with skinny straps. I want to make the off the shoulder view top right as well. Who says the 80s have nothing to offer us!

I used View C, the blue bustier top middle with skinny straps. I want to make the off the shoulder view top left as well. Who says the ’80s have nothing to offer us!

I made a mock-up and eek. This thing needed fitting! Unfortunately (fortunately?) I have no pics of the misery that it was.

The lovely Jo of Making it Well helped me with a couple of iterations but it was still far from perfect and I ran out of time to finish it for Jungle January and it got shelved, and instead I finally blogged this skirt, also leopard print.

And then Erin’s challenge came along. As I mentioned, I knew exactly what I wanted to use, this awesome Japanese inspired quilting cotton featuring a fish-scale scallop pattern and lucky cats, or maneki-neko.

My awesome maneki neko fabric, bought from MrsC's shop Made on Marion

My awesome maneki neko fabric, bought from MrsC’s shop Made on Marion

I mean, lucky cats!!! It would be perfect! But in my attempt to curb my stash-building behaviour I had bought only a metre, and it is only 112cm wide. So, what’s a girl to do with a tiny bit of fabric?

Lots of lucky cats!

Lots of lucky cats!

And I recalled my unfinished bustier mock-up, started because of fabric restrictions, and decided to finish fitting it and use that.

And then I discovered I had 1.5 metres of my lucky cats fabric. And I couldn’t bring myself to use it on the bustier when I had enough to make something bigger and show more of the print.

And then I recalled that the fabric I’d earmarked for Jungle January was blue leopard, and Erin had said cat-fur prints counted. It seemed only sensible to finish my blue leopard top! And I did.

I had no idea waht to style this with, but a picnic in the park demanded something practical so black jeans it was

I had no idea what to style this with, but a picnic in the park demanded something practical so black jeans it was. I’d like to try it with pencil skirts and circle skirts. Photo courtesy Jo at Making it Well.

Before I even made my first mock-up I enlarged the pieces at the waist and hips, but not enough. Thankfully it fit pretty well at the bust so I slashed the mock-up open along the front princess seams and pinned extra fabric into them and transferred the extra back to these seams. But my second bodice had  too much in the hips, so I pinned some back out of the princess seams and made another version. The third version was still a bit gapey but I decided it wasn’t anything I couldn’t fit on the finished garment and went ahead. Sure enough, I had to trim more out of the front princess seams on the finished bodice.

I would like to make this top again as I LOVE this style of garment, so now I have to use my off-cuts to transfer my changes back to the pattern! I might also lengthen it next time. I add 3cm to the neck edge for slightly less cleavage but I think it needs more at the bottom too, as despite these jeans being “high waist” (whatever, they’re still below my natural waist, but at least they cover my butt unlike most modern jeans) I still get a crescent of bare kidneys when I sit or bend.

h

The back covers my jeans standing, but needs extra length for bending and sitting.  Photo courtesy Jo at Making it Well

g

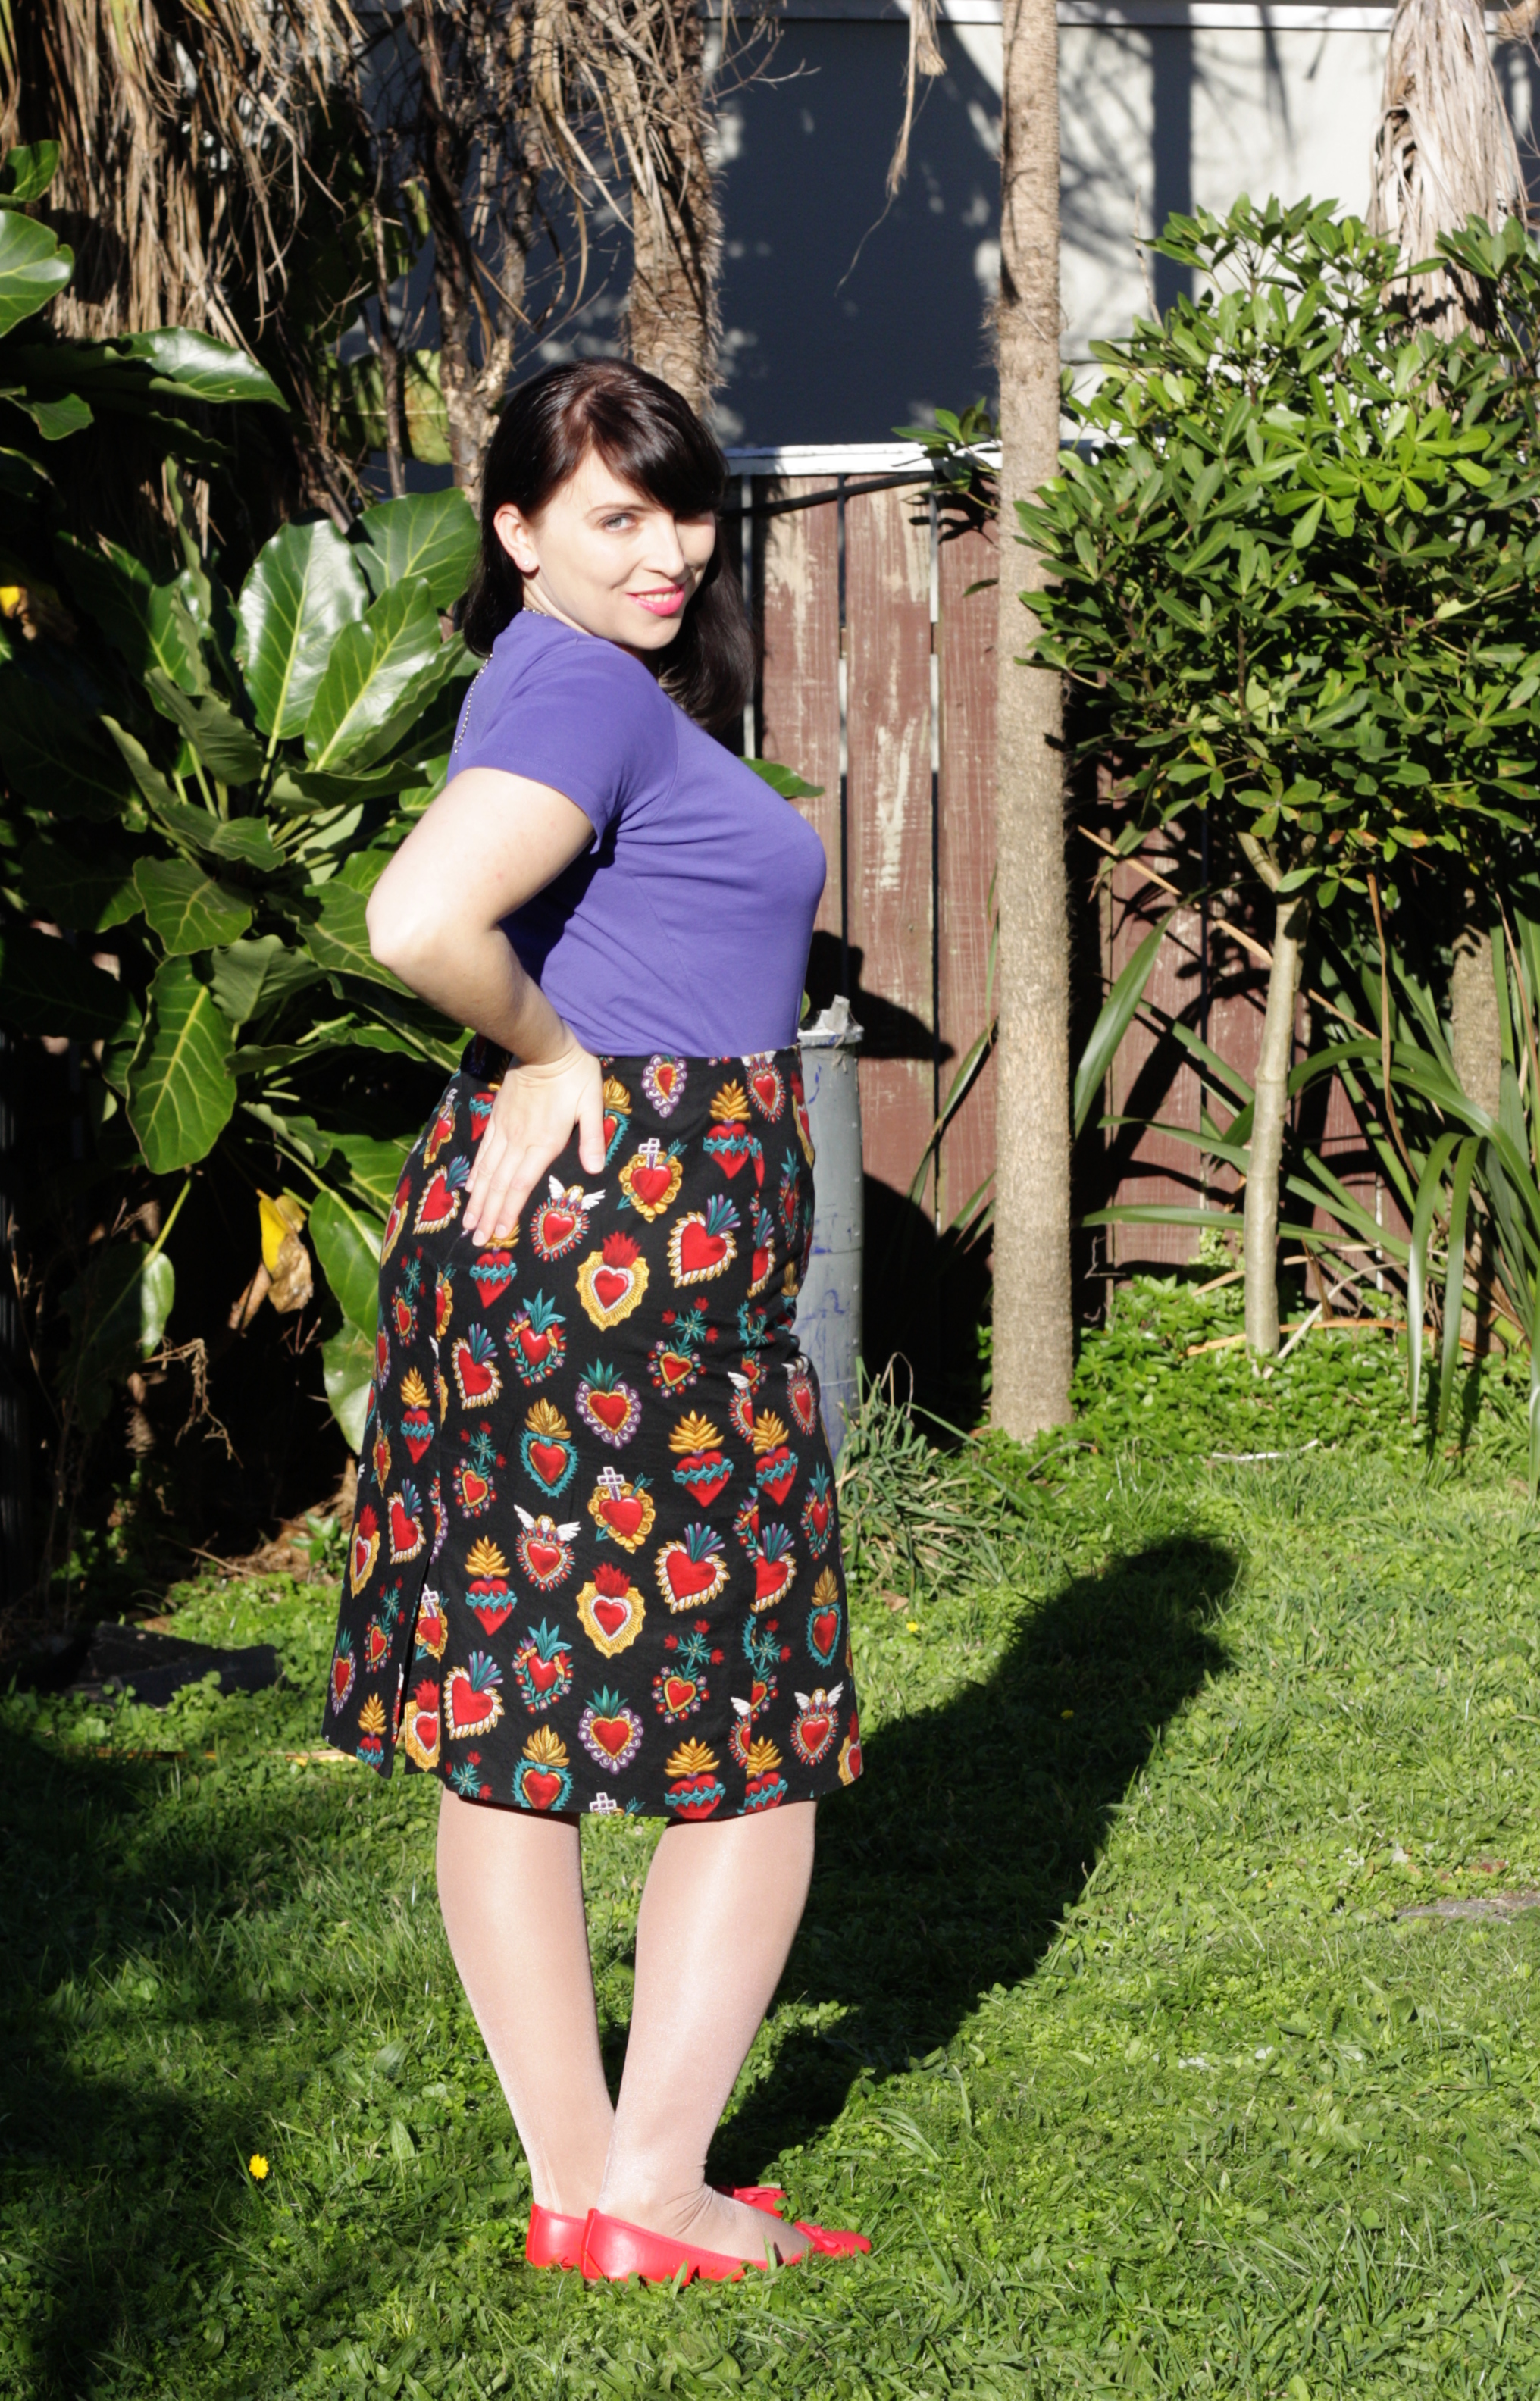
Gratuitous side shot.

Construction was easy but I did make a few changes. I subbed in an invisible zip (from stash, I do love having a zip stash!)  instead of the back buttons and disregarded the boning and lining the pattern called for. I drafted a facing for the neck, and did a standard hem. I had so little fabric that I had to cut the straps on the cross grain and interface them, and they’re still a bit stretchier than ideal, and I had to piece the facing along the same seamlines as the bodice itself as I was working with scraps by this point. I chose not to line as the fabric is a super stretchy denim and I didn’t have a lining with the right weight and stretch factor, and I made the straps wider than the pattern called for as well. I taped the entire top edge of the top as per MrsC’s tutorial  but when I make this again – and I will –  I will also take a tiny bit out of the side seam at the top, as even with the tape it is a tiny bit loose at the underarms. But not enough to alter this one!

Jo said "do something cat like" so I stuck my leg in the air and tired to lick my thigh. What, my cat does it all the time! Photo courtesy Jo at Making it Well

Jo said “do something cat like” so I stuck my leg in the air and tried to lick my thigh. What, my cat does it all the time! Photo courtesy Jo at Making it Well

Jo said "not like that, try cat ears". I remain unconvinced these look cat ear like.

Jo said “not like that, try cat ears”. I remain unconvinced these look cat-ear-like. Photo courtesy Jo at Making it Well

The Wellington Sewing Bloggers Network all got quite enthusiastic about Erin’s challenge and we decided a picnic was the best way to celebrate. Wellington spring tends to alternate rapidly and frequently between gorgeous summers’ days (like today!) and blisteringly icy cold winters’ days and the forecast for our picnic was right on the border of the switch. But the day dawned beautifully and although it was a bit gusty it was warm and sunny so we tucked into a picnic at The Dell at Wellington’s Botanic Gardens. Laura at Laulipopnz volunteered her 6 year old daughter to take group photos of us and she took these artistic snaps of us. Given her size and the fact the camera was bigger than her head, the fact our heads are all in frame is pretty impressive!

WSBN picnic attendeees! L-R Teresa, Laura, Mel, Alison, Juliet, me, Sandra M, Sophie-Lee

WSBN picnic attendeees! L-R Teresa, Laura, Mel, Alison, Juliet, me, Sandra M, Sophie-Lee. Photo courtesy Laura at Laulipopnz (well, her daughter).

Attempting whiskers! L-R Teresa, Laura, Mel, Alison, me, Sophie-Lee, Sandra M, Juliet

Attempting whiskers! L-R Teresa, Laura, Mel, Alison, me, Sophie-Lee, Sandra M, Juliet. Photo courtesy Laura at Laulipopnz.

Jo flew into Wellington that day so arrived late, so we took more photos when she got there, but after Alison had left. L-R: Sophie-Lee, Laura, Mel, Teresa, Juliet, me, Sandra M, Jo

Jo flew into Wellington that day so arrived late, so we took more photos when she got there, but after Alison had left. L-R: Sophie-Lee, Laura, Mel, Teresa, Juliet, me, Sandra M, Jo. Photo courtesy Laura at Laulipopnz. 

I included this because I have no idea what happened in this photo.

I included this because I have no idea what happened in this photo. Photo courtesy Laura at Laulipopnz

Just as we finished eating the grey clouds rolled in and the air turned cold, so we went into the Winter Gardens, right next to The Dell, to take more photos in the inside tropical heat, and then finished up with a super thick thickshake and a quickie visit to some fabric stores. That is how you have an awesome day.

Teresa kindly took a couple of snaps of me and Jo together, just cos

Teresa kindly took a couple of snaps of me and Jo together, just cos. Photo courtesy Teresa. 

More cat ears! Yes, they're cat ears, not devil horns. We are bad at catting.

More cat ears! Yes, they’re cat ears, not devil horns. We are bad at catting. Photo courtesy Teresa. 

If you want to check out the blogs of the WSBN people mentioned here, here are the links:

Jo at Making it Well
Teresa at Adventures of a Girl from the Naki
Sophie-Lee at Two Random Words
Mel at The Curious Kiwi
Sandra M at Flossie FT
Laura at Laulipopnz
Juliet at Crazy Gypsy Chronicles
Alison somewhere awesome

Thanks to Erin, Anne, Sophie-Lee, Jo, and the whole WSBN for being awesome, and thanks to the sewing blogging communities for giving me the top that the internet built! And now I have regular leopard, pink leopard, and blue leopard in my repertoire. Only another gazillion to go to have the whole set!

WSBN Spring Fling sewing room tour

20 Sep

The ever inventive Gemma over at 66 stitches suggested to the rest of the WSBN that we do a sewing room tour over the month of September, a Spring Fling to celebrate the new season, and I agreed to do the 19th! Wait, it’s not the 19th? Well, it’s probably the 19th somewhere, right? The post before me is Teresa, here, and the post “after” me, ahem, is Nicola, here

Anyway, moving right along. Gemma gave us a bunch of questions to answer and the idea is to give you a tour of our space. But this tour has started some interesting conversations with my WSBN friends about our rooms and our habits and behaviors and our feelings about sharing photographic evidence of them have got me thinking, so I thought that as well as sharing my space, I’d share some of my thoughts. Feel free to just look at the pictures though, if that’s what you’re here for! (Oh, and sorry for the poor pictures, I didn’t realise how out of focus I was until tonight and if I take another set I’ll be even later posting this!

The view from the door. My room is long and narrow and it's almost impossible to get a good  shot with my cellphone camera. Featuring my massive all-purpose table, and Minerva's chair (the office one) tucked away under the table).  I wheel it out for her to sit on when she wants to hang out with me down here.

The view from the door. My room is long and narrow and it’s almost impossible to get a good shot with my cellphone camera. Featuring my massive all-purpose table, and Minerva’s
chair (the office one) tucked away under the table). I wheel it out for her to sit on when she wants to hang out with me down here.

So, what’s the thinking part? Well, I’ve been thinking about the relationships between habits and behaviours, and how the space that you work in affects your creativity and your productivity.

We’ve had lots of chats in the WSBN since we started this series about the messiness, or lack thereof, of our sewing spaces. Many of us declared our spaces to be a mess, and decided to show our spaces, mess and all, on the tour. I find it such a refreshing change to all the Pinterest-worthy media we often consume through blogs and magazines to know that mess is human, and often part of the creative condition. In fact, recently I read several articles that suggest people working in messy spaces are more creative!

But for me, if there are mountains of mess towering over me while I sew or craft I feel their presence as an oppressive force. I struggle to start a new project if there is a mess on the table and have to tidy up first, else it acts as a constant distraction. I’m not exactly a neat creator though, so during a project a mess of offcuts, misplaced objects, pattern tissue, and bits of mock up and fashion fabrics will end up smeared over all my working surfaces. But if the ripples of chaos spread out too far, that oppression will again weigh down on me until I snap and do a mid project tidy up while childhood mantras about “clean as you go” go through my head.

As the room does double duty as craft room and home office, my sole work table is also the central sorting and clearing house. This is where bills to be paid and letters to write and broken things to fix and receipts to file and to-do lists and other seemingly endless accoutrements of being a grown up collect.  A friend refers to these piles as “kipple”, which I love! I’d rather have my kipple accumulate somewhere other than my work table, but for assorted reasons my  is where it gathers.

So I find that the mess in my sewing room is tidal. Bits will accumulate like seaweed pushed up to the high tide mark, making drifts that show the currents I make as I move around my house. When I want to sew or craft that need for tidiness means I sweep through and drag it under control, tidying the piles (and often relocating them onto the bed), only for the very next wave to push more unopened mail up into a corner.

These photos were taken at a particularly low tide, as immediately after taking these photos I had a guest over and launched into a new project, both of which meant I needed to clear the table.

Same side as the door, looking back the other way. The light coming through the windows made this shot hard to get!

Same side as the door, looking back the other way. The light coming through the windows made this shot hard to get!

With my back to the desk. The door is to my right, and other than the door the entire right hand wall is two double wardrobes with sliding doors.

With my back to the desk. The door is to my right, and other than the door the entire right hand wall is two double wardrobes with sliding doors. Minerva’s chair is in front of me. At the very back of the table, by the bookshelf, is a small pile of kipple.

Back to Minerva's chair, showing our custom built desk. It's super wide and deep so that we can do lots of paperwork on it, but it still gets messy. I blame Mechanic Man

Back to Minerva’s chair, showing our custom built desk. It’s super wide and deep so that we can do lots of paperwork on it, but it still gets messy. I blame Mechanic Man

My sewing machines, tucked into a corner of my work table. Behind is a small set of drawers and a tray that contain scissors, quick unpick, pins, and all the other rapid-access stuff.

My sewing machines, tucked into a corner of my work table. Behind is a small set of drawers and a tray that contain scissors, quick unpick, pins, and all the other rapid-access stuff.

Immediately to my right when I'm sitting at my machines is this tower The tackle box on the top is filled with thread and elastic and saftey pins and my rotary cutter and other stuff that I want to be able to find quickly but aren't used every project. Zips hang off the side. The other levels are other tools and equipment, including glue guns, lots of different types of glue, paper scissors, etc. My sewing machine manuals also live in this.

Immediately to my right when I’m sitting at my machines is this tower The tackle box on the top is filled with thread and elastic and saftey pins and my rotary cutter and other stuff that I want to be able to find quickly but aren’t used every project. Zips hang off the side. The other levels are other tools and equipment, including glue guns, lots of different types of glue, paper scissors, etc. My sewing machine manuals also live in this.

My home-made corkboard (made from a pack of cork tiles and a couple of corrguated cardboard boxes). Was meant to be a beautiful moodboard, is more of a dumping ground. Yes, that is a photocopy of my cat, she sat on the printer when it  was open so I pressed the copy button! And yes, that is a copy of the NZ Fire Fighter's calendar - men's version. It's signed by Mr April. There are also my dance medals and some of my favourite quotes, amongst the debris.

My home-made corkboard (made from a pack of cork tiles and a couple of corrguated cardboard boxes). Was meant to be a beautiful moodboard, is more of a dumping ground. Yes, that is a photocopy of my cat, she sat on the printer when it was open so I pressed the copy button! And yes, that is a copy of the NZ Fire Fighter’s calendar – men’s version. It’s signed by Mr April. There are also my dance medals and some of my favourite quotes, amongst the debris.

The double wardrobes and their sliding doors. I couldn't get far enough away to show their full width, this is not quite all of it. The kimono was a gift from a previous flatmate, and the skirt is waiting to be levelled and hemmed.

The double wardrobes and their sliding doors.  The kimono was a gift from a previous flatmate, and the skirt is waiting to be levelled and hemmed.

Right hand double wardrobe, filled with drawers. This is all non-sewing supplies - yarn, paper, embroidery, masses and masses of jewellery supplies, etc

Right hand double wardrobe, filled with drawers. This is all non-sewing supplies – yarn, paper, embroidery, masses and masses of jewellery supplies, etc

The left hand double wardrobe, right behind my machines. This is all sewing or costuming related.

The left hand double wardrobe, right behind my machines. This is almost all sewing or costuming related. The shelves are custom built to support the clear bins, which are all fabric. I have an enormous stash, to the point it makes me uncomfortable sometimes. The red bin is all ribbon and trim. The second from top shelf is largely filled with shoeboxes, all labeled, one for interfacing, one for hardware (buckles and boning and bag handles), one for costuming bases (untrimmed bras and gloves), one full of flowers for costuming, one for sew on motifs and patches, and more. A few are obscured by the corner of the kimono. There is a little set of plastic drawers, like the one on my sewing table, tucked away in there for buttons. The top shelf has WIPs, both sewing and other crafts.

Attempting a close up of the sewing wardrobe. The clear bins are all fabric. I have an enormous stash, to the point it makes me uncomfortable sometimes. The red bin is all ribbon and trim.

Attempting a close up of the sewing wardrobe.

Some of my fabric goodies, stashed away in a bin. I tie all my fabric into rolls, it makes it 1000 times easier to dig through and tip them out and pet them.

Some of my fabric goodies, stashed away in a bin. I tie all my fabric into rolls, it makes it 1000 times easier to dig through and tip them out and pet them.

The other corner, opposite from the sewing cupboard. My shelves, filled with sewing and crafting books, knitting magazines, and Burda magazines; and my ironing board, currently drowning in undone ironing. Pressing in a project, yes. Ironing my washing, very infrequently.

The other corner, opposite from the sewing cupboard. My shelves, filled with sewing and crafting books, knitting magazines, and Burda magazines; and my ironing board, currently drowning in undone ironing. Pressing in a project, yes. Ironing my washing, very infrequently.

Under my massive table are smaller bins, filled with non fashion fabrics or speciality fabrics. This is where I'll find felt, leather, vintage brocade, torn pantihose, old doilies or blankets, and all my scraps for crafting/repairs. On top live a series of shoeboxes that house my excessive pattern collection. I couldn't get all of the patterns in in one shot, there's a couple more shoe boxes out of frame to the right.

Under my massive table are smaller bins, filled with non fashion fabrics or speciality fabrics. This is where I’ll find felt, leather, vintage brocade, torn pantihose, old doilies or blankets, and all my scraps for crafting/repairs. On top live a series of shoeboxes that house my excessive pattern collection. I couldn’t get all of the patterns in in one shot, there’s a couple more shoe boxes out of frame to the right.

The final corner. This bookshelf lives behind the door, right next to the desk, and is filled with household and business filing.

The final corner. This bookshelf lives behind the door, right next to the desk, and is filled with household and business filing.

This is what happens when you attempt to take a photo just as your cat headbutts you for attention.

This is what happens when you attempt to take a photo just as your cat headbutts you for attention.

She does specialise in being helpful.

She does specialise in being helpful.

I’ll be honest. I would love for my sewing space to be tidy all the time. I feel more productive, more effective in a tidy space. And it’s not just the visible space. I like my stash to be neat and tidy, and my magazines to be in date order, and everything to be under control. What this means is that I spend more time tidying then some of my friends, some of whom are incredible productive in their sewing and crafting. In fact, I have been teased for spending more time organising my stash then sewing with it!

So I wonder, could I learn to craft in chaos? Could I spend less time tidying and more time making?

Also, being the thinker that I am, I wonder what this relationship with mess means? I think about the article I linked to above, and I wonder, am I not creative because my space isn’t messy enough? As I frequently doubt whether or not I can all myself creative, I wonder should I learn to craft in chaos to somehow improve (or just prove) my creativity?

But I doubt I could as my habits are so ingrained. But at the other extreme, I do want to do more with my sewing room than just tidy it! I do want to embrace the creativity that comes with mess! So, I try to find a balance where I invest enough time in tidying that I can work in it, but not so much that it is all I do. And one day, when we no longer have a flatmate, I’ll relocate the home office and kipple pile to another room! But in the meantime, the tide comes and goes.

But there is more than just chaos versus order to contend with when thinking about our relationship with our space! What about function? What about aesthetics?

Gemma suggested we tell you a bit about our upcoming projects. I am currently head down on a complex lot of burlesque costuming. This pile of wet look foil printed knit is part of that!

Gemma suggested we tell you a bit about our upcoming projects. I am currently head down on a complex lot of burlesque costuming. This pile of wet look foil printed knit is part of that!

Functionally, the biggest pro and con is my table. My table is 2.4m long by 1.6m wide, which is big enough for just about anything. It was the very first thing I bought off TradeMe (NZ’s eBay). I bought largely because I thought it would make sewing and cutting out a breeze. To fit it in this room my then flatmate, I kid you not, CHOPPED THE LEGS OFF IT (and then used giant doweling to join them back together). I can cut on it, I can spread out jewellery supplies on it, my sewing machines live on it. And when a few years ago I started my monthly craft day it was perfect for up to 12 people to sit around and work on.  But, it totally dominates my long, skinny room. And being a single work surface (as well as aforementioned clearing house) it can get swamped, meaning I’m having to move things around as I move between activities. Another reason why I work so hard to manage the mess! Sometimes I wonder if a smaller desk just for my machines, and a smaller cutting table would be a better combo, and help me be more productive. Maybe I’ll experiment when the home office migrates in a year or so. (But in the meantime, it serves as excellent cover for the crates of craft fabrics and patterns loitering underneath it!)

She also suggested we show of our favourite bits of stash. As I love all of my stash, and digging it out is hard work, I thought I'd show this pile that has most recently been prewashed. Yes, there is four lots of polka dot, so what?

She also suggested we show of our favourite bits of stash. As I love all of my stash, and digging it out is hard work, I thought I’d show a random selection, so you get this pile that has most recently been prewashed. Yes, there is four lots of polka dot, so what?

Aesthetically, there is SO much I want to do to this room. I want new coloured walls and new curtains and beautiful furniture everywhere. I’ll be honest, I (not so) secretly want a Pinterest-worthy space! I want natural light and bright colours and a moodboard and lots of art and probably even a mason jar or two, possibly with buttons in them. I want to walk in to my room and feel like I’m looking at a magazine spread! I want to feel the same rush of lust that I got when I saw Oona’s recent colourful sewing room tour (I like to think the WSBN tour inspired her post, haha!) But I’m limited in what I can achieve by cost and time and the sheer headache of unpacking my room long enough to repaint. Not to mention the lack of functional walls (with three of them largely dominated by windows or cupboards). So I’m doing a bit here and a bit there and one day when the home office is banished to the other spare bedroom and this space is solely mine it will achieve glorious perfection. Or is that aiming too high? In the meantime the lack of beauty is yet another reason why I work so hard to manage the debris that seems to accumulate, so that I have the beauty of open space, if not the true beauty of the room. The lack of aesthetic pleasure doesn’t affect my productivity in the same way as mess does,  but I certainly feel more inspired and more creative when I look at pretty things. Thank goodness for blogs, right?

Gemma also thought we should show you some shots of our location. As the view out my sewing room windows is of our fence, here's a shot of the Island Bay beach that is at the end of my street, less than 50 metres from here.

Gemma also thought we should show you some shots of our location. As the view out my sewing room windows is of our fence, here’s a shot of the Island Bay beach that is at the end of my street, less than 50 metres from here.

I love living on the South Coast of Wellington, and when you have views like this on walks along the beach, can you blame me?

I love living on the South Coast of Wellington, and when you have views like this on walks along the beach, can you blame me?

And a parting shot of Island Bay taken from a hill looking down. I didn't take this, my aunt-in-law did, but it is too gorgeous not to include.

And a parting shot of Island Bay taken from a hill looking down. I didn’t take this, my aunt-in-law did, but it is too gorgeous not to include.

Thanks for sticking it out this far, if you have in fact made it to the end!


So tell me, what about your space, and your relationship with it, influences your creativity and productivity?

FO: pink leopard cape and petticoat

28 Aug

Are you sick of pink leopard yet? Cos I’m not and there’s more to come!

Social rock and roll is a hot and sweaty affair and freedom of arm movement is paramount, so all of my ball dresses are sleeveless. But the ball is also in winter so a wrap or cover-up is essential between vehicle and venue, and even sometimes when you’re daintily evaporating at the tables between songs. In the past I’ve just used a regular old cardi out of my wardrobe. But really, surely with 11m of pink leopard I could do better?

At the time, the WSBN were planning their next sewing challenge and capes were the topic. Mel, Kat, and Juliet debuted their capes, using the free online Peppermint pattern (scroll down the linked page to find the pattern), and Eureka! A cape was just the deal!

I’m going to cut to the chase, for once. I didn’t get it made it time. It was soooo close, but I had to let it go.

But I returned to the project after the ball and finished my pink leopard cape. Check it out!

Practical pink leopard cape. Ok, maybe practical is pushing it!

Practical pink leopard cape. Ok, maybe practical is pushing it!

The Peppermint Cape is super easy to make. My only real issue with it is the sizing. It’s multi-sized, yay! But I could find no information on what people sizes each pattern size was meant to represent. It’s Aussie based so I assumed the sizes were similar to RTW and then assumed that Aussie RTW was similar to NZ RTW so cut the 14. It’s perfectly acceptable but I do wonder if it’s a tad loose around the elbows. But never mind.

As demure as it gets in pink leopard.

As demure as it gets in pink leopard.

I also found it impossible to ease the shoulder caps in without gathers, but that could be my choice of fabric. But I decided I liked the gathers so that was an easy solution anyway.

The one part I agonised over for ages was the closure. I’d seen a nifty RTW trick that had a fake frog closure made from buttons. A button is sewn either side of the opening, and the tails of a loop of ribbon are caught under one button. The loop then slips on and off the other button.

But try as I might, none of the buttons in my stash worked, and none of the ones I bought to try worked either.  What to do?

My solution had a roundabout way of arriving. The neck of the cape is bound with self bias. In order to use the scraps (afterall, I only have another 8 metres so I need to be stingy), I had to piece the binding. One joined, my final length of bias was much longer than needed, so I positioned it on the cape so the join was at the back, leaving the raw excess hanging at the front. I used this to tie the cape in place one day and realised this was my solution! But on closer examination, one end wasn’t quite long enough to use for a neat and tidy bow. Determined to use the ends somehow, I canvassed for opinions and a genius friend (which one I can’t remember) suggested making a Chinese ball out of it! Brilliant! So I hand sewed the raw edges of the bias together to make tie ends, mangled one piece into something approximating a Chinese ball, and turned the other end into a loop. Perfect. Except you can’t see it clearly in the photos. Sorry.

I kind like the silhouette of the wide cape across the elbows, much to my surprise!

I kinda like the silhouette of the wide cape across the elbows, much to my surprise!

I decided to line it with polar fleece to give it some warmth and softness against my Wellington-wind exposed arms, and found the perfect pink fleece at Arthur Toye.

Fuzzy wuzzy hot pink lining!

Fuzzy wuzzy hot pink lining!

Although unintentional, one of the great things about this cape is that it is reversible! For when pink leopard on pink leopard is too much.

Oh yes, much more subtle.

Oh yes, much more toned down.


Almost toned down.

Postively subtle in fact.

And what does one do with leftover scraps of hot pink polar fleece? Put it on the couch for Minerva to sleep on of course!

The other thing that rock and roll needs is petticoats. My collection has increased since I made my first one with MrsC! But this is my only white petticoat and started life as two hand-made petticoats.

Not an apron, but my white sparkly petticoat, layered over a locally made pink one.

Not an apron, but my white sparkly petticoat, layered over a locally made pink one.

I don’t have much to say about the construction that MrsC hasn’t already covered. But I do have some tales, of course! It wouldn’t be me without them!

Almost immediately after making that first black petticoat I decided I needed a white one to wear with my pink and white skirt. And a blue one and a purple one and a pink one. So I went to Fabric Warehouse, found a huge roll of white nylon tricot (which apparently dyes really easily), discovered it was hugely reduced (as in, under $3/m) and bought 36 metres! It puts my 11 metres of pink leopard to shame. And I have yet to make more than this one petticoat out of it! But I did make one, a simple single frilled one using a worn white sheet fine white cotton for the yoke. In the black one we stitched the yoke of the petticoat onto a straight slip in a far more robust knit, and turned the edge of the slip to make a casing. But the yoke in my was one much curvier than the top of the straight slip, and in such a thin fabric my attempt to turn it under to make a casing was… unsuccessful. I also had no white elastic! However, I was making it in anticipation of a dance competition that was, of course, only days away so I gave up, plunged on, and stitched the yoke straight to the elastic in the ugliest way possible.

I also made a second petticoat, with sparkles on it, that I love! This was all serendipity, not planning though. You see, once upon a time there was a TV show called “My Big Fat Gypsy Wedding” that followed British Gypsy and Traveller families as they prepared for their daughters’ weddings. In this culture, weddings are hugely competitive and the usually very young brides pour vast effort into making the dresses bigger and crazier than their peers’. Tulle. Butterflies. Sequins. Rhinestones. Hoopskirts. Trains. Even LEDs! A friend threw a “My Big Fat Gypsy Wedding” themed party and told her guests to turn up in their craziest, blingiest costume. I sadly couldn’t make it, but afterwards one of my friends approached and this ensued:

“I bought this hideous sparkly white tulle for the My Big Fat Gypsy Wedding party because it was the tackiest thing I could find and it is hideous. I don’t want to keep it and realised I could give it to you.”

“Squeeeeee!!!!! I LOVE it!”

“I knew you would.”

Ladies and gentlemen, it is always good to have a friend of dubious taste to offload your tacky stuff to. I am that friend.

Having got it shortly before the competition I made another petticoat out of this, but I had now run completely out of elastic so I threw a casing on it and added a drawstring! And then I competed in these petticoats, complete with ugly elastic, drawstring and safety-pin.

They went into my good-intentions pile shortly after that, where they languished. But one day my fantastic friend The Sewphist was over at a craft day and had run out of tasks and asked if I had anything she could help with. The petticoats had risen to near the top of the pile, so I fished them out and she fixed them by stitching them both onto a single rectangular intact casing and inserting white elastic!

So now I have a single white petticoat, two layers, soft tricot underneath and sparkly tulle on top, and when I dance the sequins glitter as my skirts twirl. It doesn’t get any better than that!

Unless it is this outtake.

I don't even know what I was trying to do here, except make an idiot of myself?

I don’t even know what I was trying to do here, except make an idiot of myself? But I’m entertained and I thought you might be too!


FO: pink leopard rock and roll dress

31 Jul

It’s been a long time coming, but I’m stoked to be able to share my pink leopard rock and roll dress with you!

Bedroom eyes!

Bedroom eyes! Or psycho eyes. We weren’t sure. Photo courtesy Sarah

Like my skull and roses dress and flame dress before it, this was my annual make-the-most-crazy-dress-I-can for the Feet With Heat Dancer’s Ball (see here and here).

I first found and fell in love with the fabric at Global Fabrics (now The Fabric Store) a few years ago, but managed not to buy any. Then the fabulous MrsC gave me a remnant for my birthday a few months later!

Skip forward a couple of years and I’m planning my ball dress. I decided I want pink leopard and am hunting for a quilting cotton in the perfect shade of hot raspberry when I get a text from MrsC – “Global still has the pink leopard, and it’s HALF PRICE!!!” Although not the shade I had imagined, one does not look a pink leopard gift horse, err, leopard, in the mouth, so I strode in. As luck would have it, I ran straight into MrsC who was also succumbing to the sale (although, not on pink leopard) so she supervised as I took the bolt to the counter.

“4m please” I said. That’s plenty for a rock and roll dress.

MrsC cleared her throat. “She’ll take 10m thanks.”

“10m! Have you lost your mind!” I screeched.

“Trust me. This is like a SIGNATURE print for you. I’ve never forgiven myself for not buying more of that rose printed silk-cotton that I made the dress out of that I wore until it disintegrated. You’ll use it. Or you could sell it if you change your mind later. And it’s such a good price. Trust me…” she wheedled.

I have many mottos but one is never argue with your Wise Woman Advisor. I asked for 10 metres.

The assistant unrolled the fabric. At 4 metres we discovered it was cut. MrsC gave me the gimlet eye so I ask to to take the 10 metres in two pieces. The assistant measured out the remaining piece and there was only 7 metres on the bolt. MrsC now turned her gimlet eye to the assistant and suggested they give me the entire 11 metres – but only charge me for 10, due to the cut.

They obliged. And THAT is why you never argue with your Wise Woman Advisor. You want her on your side.

Dainty shot

Dainty shot. Photo courtesy Sarah

The fabric is cotton spandex blend, but heavy, more of a twill weave than a sateen weave. I settled on Butterick 5033.

Butterick 5033

Butterick 5033, I chose View A

First up, the mock-up. I did my normal trick of finding the finished measurements (for Butterick, printed on the bustline and waistline on the tissue paper) and graded between the sizes that looked the best, completely disregarding the size chart. After a hilarious episode where I attempted to teach Mechanic Man to pin the centre back closed (honestly, the man can strip and rebuild an engine, but explain to him that the pointy bit goes in and comes out parallel to but 1.5 cm away from the edge and he’s completely lost), I got into the bodice. And WOE! Woe is me! The bottom wouldn’t even touch.

My first bodice toile. Oh no!

My first bodice toile. Oh no!

I mournfully looked at the photo that Mechanic Man took for me and started mentally calculating the potential-faffing-about-factor, and resolved there was only one solution.

One does not have a Wise Woman Advisor in the family just for fabric peer pressure. I took my bodice to MrsC.

I’d already resolved the shoulder seams needed to be reduced to 1cm, and did this on arrival. Then I got pinned in (with much more efficiency) and waited for the diagnosis. MrsC, in the magical ways of Wise Woman Advisors throughout the ages, clicked her tongue, produced a ribbon, tied it around my natural waist, cut off the fabric under the ribbon, and pronounced it fixed.

No, seriously. It was a perfect fit. Just Like That. (Wise Woman Advisors – you should get one).

Swishy shot

Swishy shot. Photo courtesy Sarah

It was a piece of cake after that. I lined the bodice with some hot pink stretch cotton poplin I fortuitously bought at the same time I bought the black stretch cotton for the bodice of my flame dress with the startlingly acute realisation that pink would feature in my future (and likely will over and over again). I measured the seamline on my new bodice and the skirt and they were so close I decided not to adjust the skirt, but to make as per the pattern and take in the side seams if needed to meet the bodice. It’s not like the skirt of that volume would suffer.

I did however discover the underarms sagged quite unattractively. So I used MrsC’s taping method and eased it on quite aggressively. Perhaps too aggressively, there are some little puckers when I’m not wearing it, but I’m totally pleased with the effectiveness of this technique.

Armhole before taping, You can see that much of my bra because of the gaping.

Armhole before taping, You can see that much of my bra because of the gaping.

The other side, already taped, and fitting close to the skin

The other side, already taped, and fitting close to the skin

The skirt was a bit of a deliberately brave move for me. It has a centre front seam and three knife pleats either side. Did I really want pleats in the centre front or should I stick with a circle skirt? Did I need the extra bulk right of pleats and all that additional fabric right over my prominent tummy?

That was the thought that did it for me.  As a body positivity enthusiast, but not yet very experienced self-practitioner, I decided to give a silent SCREW YOU to whoever decided that women only look good with tiny waists and wear the skirt because I like it and that is the only opinion on the face of the planet that matters when it comes to what I wear. Plus, you know, I’d never made pleats before.

The pleats were easy, the skirt sewed up really straightforward (although I did get worried at one point as I attempted to maneouver the entire skirt across my sewing table that I was going to get trapped under it and weeks later they’d finally find me buried under 3 tonnes of leopard print) and the dress was done!

More swishing. Big skirts plus petticoats demand it.

More swishing. Big skirts plus petticoats demand it. Photo courtesy Sarah

I had originally decided to do the cutout, for a few reasons. First, it’s on the pattern. Second, I like cut-outs on principle. And third, I need lots and lots of ventilation in a dancing dress. But after putting the bodice together, I was worried about attempting the cutout. What if I hated it? What if I cocked it up? I certainly couldn’t undo it! So I made a sample to test out the method and the look. I wasn’t convinced.

So I took my sample along to the WSBN meet-up at the Home Sewn exhibtion at The Dowse Museum (which I never blogged about but others did). The conclusion was pretty universal. Cut out plus pink leopard might just, well, go in a direction that I didn’t want to go in. So I abandoned that. But one day, I will make this dress (or a variation thereoff) and the cutout WILL happen! (Entertaining side story, as well as passing my sample around, MrsC did an impromptu bodice fitting in the middle of The Dowse, in a room filled with hundreds of people, to the entertainment of the WSBN members watching.)

Twirly!

Twirly! Photo courtesy Sarah

The weekend of the ball I had my regular monthly craft day at my house, and my lovely friend Miss La Belle attended. A couple of days before, at class, a fellow dance student asked if Punk Flatmate and I would be wearing matching outfits again, as they’d loved the matching flame outfits, and almost the same day Collette released their tutorial for a men’s necktie. Miss La Belle was looking for a project to do and volunteered to make the neck tie out of the scraps of my dress, and it came out AMAZING. But her awesomeness doesn’t stop there. Inspired by the pink and chocolate combination, she also made me two pairs of earrings and a necklace in that colour combo! I wore the studs on the night.

Lots of skirt!

Lots of skirt! Photo courtesy Sarah

The day of the ball rolled around, and as I normally do, I booked the skilled Claire of The Vanity Case to do my hair and makeup. Miss La Belle decided not to stop her awesomeness just with a necktie and jewellery and came over on the day to day Punk Flatmate’s hair pink to match and also painted my nails for me. IN PINK LEOPARD. Hell yeah!

Oh yeah. Pink leopard fingernails!

Oh yeah. Pink leopard fingernails!

I think it was one of the best hair and makeup jobs Claire has done yet, and I couldn’t believe it was really me in the mirror when she was done. Unfortunately, she’d had a really slim window to come over before I had to leave for the ball, so I skipped photos at home, thinking I’d use the event photographer to make up for it. She did take this snap on her phone though.

Hair and makeup by The Vanity Case

Hair and makeup and photo by The Vanity Case

Unfortunately, there was no event photographer! So Punk Flatmate and I asked some friends to take some snaps, but none of them really turned out spectacularly, but I’m still pretty sure you can get the idea that WE LOOKED FREAKING AMAZING HELL YEAH WE DID.

We're looking at two different cameras, whoops! But check out that awesome tie and matching mohawk! Isn't he gorgeous!

We’re looking at two different cameras, whoops! But check out that awesome tie and matching mohawk! Isn’t he gorgeous! Photo courtesy Julian. Or Chris.

But the lack of event photos means no action shots of my skirt and petticoats flying and flashing my hot pink knickers I bought for the occasion. But I can’t leave you without a twirling pic at all can I!

Obligatory mid twirl photo

Obligatory mid twirl photo. Photo courtesy Sarah

Guess what! There are two more items for this ensemble to show off. But given my complete inability to blog in 50 words or less, I’m saving them for the next post!

FO: retro rogue shrug

8 Jul

Another set of photos from my fabulous Sarah, I don’t know how I’d blog without her!

My mum was doing a big clear out of yarn recently (honestly, her yarn stash could clothe a small nation, if it were ever knitted up. I look at my stash and see the apple didn’t fall far from the tree) and she decided to give me some, unbeknownst to me. So imagine my delight when A skein and a bit of beautiful teally blue Cascade Eco Plus 12-ply yarn turned up at my house! How very exciting!

I was between projects and decided a quick 12-ply small project was just what I needed, so I hit Ravelry and found the Retro Rogue tucked away in my favourites.

Remember all bedroom eyes are courtesy of the sun.

Remember all bedroom eyes are courtesy of the sun. You can just see here above my underarm the decrease row.

As the yarn was a skein and a tiny bit, I weighed the small bit and did some simply math to see how much yardage there was, and was disappointed to find out that I was short. But Mama Magpie, being cleverer than me, suggested I do the same for the full skein as sometimes they’re over the marked weight, and sure enough, it was, and it meant I had just enough yardage! I was delighted and cast on.

The colour is slightly deeper than this, the intense sun has lightened it up a lot.

The colour is slightly deeper than this, the intense sun has lightened it up a lot.

As I was travelling and wanted to take this with me, and didn’t want to run the risk of loosing the little ball, I cast on with that and joined the big ball in after only about a dozen rows. The pattern is super easy. The whole thing is 2×2 rib, with one row of decreases very cleverly done so that it remains 2×2 rib afterwards. It is basically a giant cross shape, with 8 stitches cast on at each end part way through and then the same cast off to create the “arms” of the cross, which in turn become the sleeves. It is folded in half at the end into a T shape and seamed up the sides, and tadah!

The whole thing took me about 2 weeks and being 12-ply required very little actual knitting time. I did realise at one point I’d stuffed up a stitch in the rib and had to drop down about 30 rows to fix it, but it was worth it, and other than that it was the easiest thing  have ever knitted. The yarn is really smooshy and snuggly too.

You can see the little sleeves more clearly here.

You can see the little sleeves more clearly here.

I did have one irritation with it though. Although I made no modifications to it at all I used less yardage for my size than it called for. How do I know this? Because I ended up with a much bigger bit leftover than I expected. In fact, the part skein I finished with was bigger than the part-skein in the original parcel. Yep. I could have made the whole thing out of the full skein and wouldn’t have had to join and weave in the ends. Argh!

The other thing is that my sleeves appear to be a bit shorter than some of the models on Ravelry, but I think I’ll cope with this. Now I just need to work out how best to wear it!

This photo is technically an outtake, but I just kinda like it.

This photo is technically an outtake, but I just kinda like it. Plus it shows the underarm seam!

If you’re looking for a for a quick satisfying knit this is a great project, let me know if you try it out!

“The girls” – the women at the heart of my life

4 Jul

I am lucky to be part of a great circle of friends, wonderful, talented creative ladies every one of them. These women are the people I refer to when I tell my Mechanic Man “I’m seeing the girls.” They’re the ones I ask for advice and give advice to, the ones who have helped me out, the ones I help out, and the ones whose company I seek when I am seeking company. We’ve done photo shoots together, picnicked together, taken part in historical costuming events together, road tripped together, and played Sing Star together. I adore each and every one of them and wouldn’t be without them. And as I’ve already mentioned them more than once, and am likely to mention them again, I wanted to devote a bit of space to telling you how I was blessed by them.

MrsC 

MrsC was a gift to me by my old employer. Truly! I was part of a team of three reporting into the wonderful Pennie. At the beginning of 2008 BOTH of my colleagues resigned, just over a month apart, and I spent the next three months singlehandedly performing our function and desperately waiting for back-up. Pennie started recruiting for two new people, one of whom would manage me and the other recruit. But as I was the only person left, Pennie was determined that both the new hires would be people I’d get on well with.

MrsC was one of the final two candidates for the manager role. The other candidate was a little more qualified (which I find hard to believe because how could anyone be better than MrsC at anything!) but Pennie knew that Mrs C was into that “weird sewing stuff” that I did and figured that our personalities would match so the deal was struck. And she was right. Oh so very very right. Lithium and oxygen explosively right. We hit it off instantly. We’d start every day at the office with a catch-up about our sewing and crafting, our lives, our men, our hopes and dreams and frustrations. Occasionally we talked about work, if it didn’t interfere. Our friendship extended waaay past a normal boss-worker one.

MrsC always encouraged me in everything (if by encourage you mean threatening to make my work-place performance review hinge on my sewing performance). She encouraged me to seek out burlesque classes and supported my enthusiasm. (I’m possibly the only office worker to have been bought underwear by her boss not once but THREE times.) She has rescued me from sewing woes and kindly made me not one but two dresses when needed for specific occasions and I wasn’t able to do it! She famously left her job as my manager to open Made on Marion, Wellington’s best craft supplies store. It shows how alike we are that this is also a dream of mine; one I first planned over ten years ago. I’ll get there one day!

MrsC is one of my dearest friends. My mum refers to Mrs C as my Wellington mum, and there’s something in that! She’s creative and talented and passionate. I couldn’t imagine my life without her dry humour, her endless capacity to listen and talk, and well, her just all-round freaking awesomeness.

At the end of 2009, just over a year after I met MrsC, I had the idea to invite her and a couple of other crafters over to take advantage of my newly set-up giant craft room. Mr C thought it was a great idea and the unimaginatively named monthly craft day was born and has been going ever since.

Mrs C and I ready for the Art Nouveaux ball, organised by The Dreamstress

Mrs C and I ready for the Art Nouveaux ball, organised by The Dreamstress of course. MrsC made her dress. Photo courtesy MrC.

The Dreamstress, Mrs C, and Madame Ornata playing dress-ups. Photo courtesy Sarah.

The Dreamstress, MrsC, and Madame Ornata playing dress-ups. MrsC made her purple coat and The Dreamstress made both the other outfits. Photo courtesy Sarah.

The Dreamstress at the opening of Mrs C's shop, telling people about upcoming tap pants classes

The Dreamstress at the opening of MrsC’s shop, telling people about upcoming tap pants classes

The Dreamstress

MrsC, unlike me, has an interest in truly historical costuming. (My fashion interests don’t really start until the 1930s). In 2009 there was a ball and show called The Affair of the Diamond Necklace and attendees were required to dress in era-appropriate clothing and attend an interactive dinner set in the Court of Versailles. Upon Googling this, MrsC discovered The Dreamstress, who was making up a very fancy dress to wear to it. Being the social butterfly she is, Mrs C contacted The Dreamstress and they struck up a fast friendship.

When I had my inaugural monthly craft day, Mrs C asked if she could invite The Dreamstress. The more the merrier I said! And so The Dreamstress entered my life when she turned up at my house that first month and has been a treasured friend ever since. I doubt there’d be as many days of dress-ups and photo shoots if not for The Dreamstress. The Dreamstress is without doubt one of the most amazing seamstresses I know and I’m always amazed at her skill and talent. I consider myself lucky to get to handle and sometimes even wear her work and one of my goals is to be able to afford a custom corset, or three.  And The Dreamstress is of course a wonderful person to know. Witty, kind, and generous, full of wry observations and always up for an adventure, she is fun to be around.

Shell with her bridesmaids; The Dreamstress, The Sewphist and me

Shell with her bridesmaids; The Dreamstress, The Sewphist and me. Photo courtesy Sarah

The Dreamstress, Madame O and Shell, at a photo shoot. Shell was there to do styling and both The Dreamstress and Madame O are wearing things they've made. Photo courtesy Sarah.

The Dreamstress, Madame O and Shell, at a photo shoot. Shell was there to do styling and both The Dreamstress and Madame O are wearing things they’ve made. Photo courtesy Sarah.

The Dreamstress playing dress-ups with Madame O, and Shell helping to style. Photo courtesy Sarah.

The Dreamstress playing dress-ups with Madame O, and Shell helping to style. Photo courtesy Sarah.

Madame Ornata

The story of how I met Madame O is short and sweet. When Mrs C extended the initial invitation to craft day to The Dreamstress, she in turn emailed me asking if she could bring a friend. So Madame Ornata arrived with the The Dreamstress and I loved her on the spot.

Another talented and incredible woman, she does the most exquisite embroidery that will make you whimper with delight, makes amazing historical gowns, and crafts beautiful, delicate jewellery. She’s also a well educated and talented scientist.

She shows up regularly in The Dreamstress’ blog modelling garments. She also has the most enthusiastic, outgoing, buoyant approach to life. Being with her is like being with a box-load of puppies, all wriggly unconstrained enthusiasm that makes you want to laugh and enjoy life just by being in her presence. She’s damn funny to boot and an absolute ham when on camera – oh I wish I could show you some of the photos we have of her – but some are too outrageous for the public! What a glorious woman to be friends with.

Me and Madame Ornata playing stupid dress-ups at the beach, along with Shell and Sarah. Photo courtesy Sarah.

Me and Madame Ornata playing stupid dress-ups at the beach, along with Shell and Sarah. Photo courtesy Sarah.

I don't even know what we were doing. I think this was under the instruction to "emphasise the wind". Madame O got it right.

I don’t even know what we were doing. I think this was under the instruction to “emphasise the wind”. Madame O got it right. Photo courtesy Sarah.

I'm not even sure what this was from! The Sewphist wears a dress by the Dreamstress, Madame O made her corset and skirt

I’m not even sure what this was from! The Sewphist wears a dress by the Dreamstress, Madame O made her corset and skirt

The Sewphist

About the same time I started craft day, Mrs C and I decided to throw a craft market at work for Christmas. A colleague of ours, LM introduced us to another friend, who we told all about our market. She in turn introduced us to a friend of hers who makes amazing things, so that she could put her wares in our market.

Simply selling her stuff wasn’t enough, we wanted her as one of ours, so “Come to craft day!” I chirped! So The Sewphist came, she met The Dreamstress and Madame Ornata, and another link in our group was permanently installed.

The Sewphist is multi-talented, not only making incredible giftwares for sale but running Made.It, a great hand made goods shop in town! (Seriously, it’s an amazing store, she curates the most incredible range or handmade pieces.) She also speaks French fluently and has an amazing choral voice. She’s also kind, funny and thoughtful, and is the dear friend who cut out and made up my flame skirt while I tidied up her fabric stash. Yet another special woman I am lucky to be friends with.

The Sewphist, me, and Shell lounging at The Sewphist's birthday party at hers. Photo courtesy Sarah.

The Sewphist, me, and Shell lounging at The Sewphist’s birthday party at hers. Photo courtesy Sarah.

The Sewphist being adorable along with Shell, both in The Dreamstress creations

The Sewphist being adorable along with Shell, both in The Dreamstress creations. Photo courtesy Madame O.

The Dreamstress, The Sewphist and me, as bridesmaids for Shell

The Dreamstress, The Sewphist and me, as bridesmaids for Shell

Sarah

In June 2010 the above trio of ladies were well established as dear friends. Mrs C and I were flogging off unwanted fabric (yes, it does exist!) at Fabric-a-brac the morning of one of The Dreamstress’ historical shows.

A lovely lady picked up a piece of my fabric and was eyeing it up. I asked her what her plans were for it and she said a historical skirt. Spotting an opportunity, I thrust a pamphlet for the afternoon’s show into her hands. She then bought the fabric as well as a sari from MrsC’s stash to line a coat.

That afternoon she showed up at the show, wearing a gorgeous coat she’d made. I introduced her to MrsC as the person who’d bought the sari that morning and she opened the coat to reveal it was self-made and the lining was another sari. MrsC laughed – she’d sold THAT sari to Sarah at the previous FAB! “Come crafting next week” said I, and she did, and another firm friendship was made, with me and with the others above.

Sarah is a fearless creator, setting her mind on something then figuring out how to do it. She has the brains of a rocket scientist (seriously! She has a Masters in astronomy) and the creativity of an artist. She has a fabulously dry wit and is great fun to hang out with. She is also the photographer of our group, talented and creative, and the mastermind behind my flame dress fancy shoot as well as the credit of most of the photos here. If there is a dress-up to be had, she’ll be holding a camera.

Sarah and Nini, a rare sighting in the wild as Sarah is normally operating the camera, and Nini - the only one with children - doesn't make it to events as often as we'd like! Nini took the Ghosts of the Titanic theme to a whole new level with her zombie outfit. Photo courtesy Madame Ornata

Sarah and Nini, a rare sighting in the wild as Sarah is normally operating the camera, and Nini – the only one with children – doesn’t make it to events as often as we’d like! Nini took the Ghosts of the Titanic theme to a whole new level with her zombie outfit. Photo courtesy Madame Ornata

Sarah and Emily being beautiful Edwardian women at The Dreamstress' Ghosts of the Titanic historical costume ball. Photo courtesy Madame Ornata.

Sarah and Emily being beautiful Edwardian women at The Dreamstress’ Ghosts of the Titanic historical costume ball. Sarah made her gown and Emily models a Dreamstress creation. Photo courtesy Madame Ornata.

Sarah with her camera, showing Madame O a shot, during another dress-up day. Both of them in their own creations. Photo courtesy The Dreamstress

Sarah with her camera, unsurprisingly, showing Madame O a shot, during another dress-up and photo day. Both of them in their own creations – and that was Sarah’s first ever corset! Photo courtesy The Dreamstress

Shell

Shell is an American who met The Sewphist online in a craft-related forum. In November 2010 she came to New Zealand for a working holiday. The Sewphist brought her to Sarah’s birthday party pretty much straight from the airport when she arrived, and was instantly adopted by our entire group.She met her now-husband on her second day in the country too, so she didn’t do too badly in two days!

I was lucky enough to have Shell flat with us for about 6 months of her stay, and she was great fun to live with. Our whole group was heart broken when she had to leave New Zealand at the end of her visa, taking her new husband with her, and delighted when the two of them secured a new visa so she could return.

Her NZ wedding was a real family affair, organised in 6 weeks, with MrsC acting as Mother of the Bride; The Dreamstress as dressmaker; The Dreamstress , The Sewphist and me as bridesmaids; Madame Ornata as florist and table decorator; and Sarah as official photographer; and it is of course thoroughly blogged on The Dreamstress’ blog.

Shell is sweet, funny, creative, and basically damn good fun to hang around with.  She has a clever and witty humour and is easy to talk to about anything. And she’s tolerant of us teasing her about her accent and an amazing potter. It was a real privilege to be part of her wedding and I’m so pleased to be her friend.

I was lucky to be one of Shell's bridesmaids, along with The Sewphist and The Dreamstress. Photo courtesy Sarah.

I was lucky to be one of Shell’s bridesmaids, along with The Sewphist and The Dreamstress. The Dreamstress made Shell’s dress and MrsC made mine. Photo courtesy Sarah.

Shell and I backstage doing last minute sewing for The Dreamstress' show Grandeur and Frivolity

Shell and I backstage doing last minute sewing for The Dreamstress’ show Grandeur and Frivolity. Photo courtesy Sarah

Shell and I modelling The Dreamstress corsets for a special corset edition of Dr Sketchy, presented by The Dreamstress

Shell and I modelling The Dreamstress corsets for a special corset edition of Dr Sketchy, presented by The Dreamstress

Shell does spooky well. Madame O does hilarious well. This is what happens when they occur at the same time. Photo courtesy Sarah.

Shell does spooky well. Madame O does hilarious well. This is what happens when they occur at the same time. Photo courtesy Sarah.

Nini of Things Unseen

I met Nini through sewing classes that I attended way back in 2007, and thought she was lovely. When I started craft day in 2009, I asked her to come along and we started to get to know each other better, and I’m so glad we did. Through craft day she eventually met everyone else in the crew too! Nini replaced sewing with jewellery making as her creative outlet, and quickly settled on a steampunk, Victorian, gothic aesthetic. Her work is simply beautiful.Every one of us has some of her beautiful jewellery and although her kids mean she doesn’t get to hang out as often as we’d like, I always enjoy her company when I get it. She is a free spirit, exuberantly generous, creative and kind, with a wonderfully refreshing viewpoint on the world that make conversations with her fascinating.

Nini showing her beautiful creations to Madame Ornata, who (like most of us) owns a collection of Things Unseen jewellery, and hers is definitely the largest!

Nini showing her beautiful creations to Madame Ornata, who (like most of us) owns a collection of Things Unseen jewellery, although hers is definitely the largest! Photo courtesy Sarah

Also from the Titanic ball, zombie Nini and Madame O

Also from the Ghosts of the Titanic ball, zombie Nini and Madame O

Emily

I met Emily through MrsC. MrsC had earmarked us to meet as she thought we’d get along. One day in 2010 MrsC realised Emily and I were both going to the same burlesque event and thought “Aha! You can now meet!” Equipped with MrsC’s info, and a memory of a LinkedIn photo, I traipsed up to a beautiful redhead during the intermission and asked “are you Emily?” And she was.And we talked and got along but didn’t really get a chance to arrange to catch up again.

It turned out she also knew The Dreamstress, and shortly we met again at one of The Dreamstress’ afternoon teas. I invited her along to craft day, and, as per usual, she met and bonded with the group. Emily has a sharp mind, and is wonderful to talk with. She has a great dry wit, a fabulously entertaining and insightful blog, and a sharp fashion sense. She’s also the only one in this group who shares my love of burlesque and modern pin-up and leopard print so we see each other through that social circle too. She’s a talented MC and always fantastic to watch on stage, working her magic on the crowd. Again, what a delight to have her in my life.

I'm wathcing Emily play the theremin she had set up for her retro/steampunk/burlesque/dinosaur party

I’m watching Emily play the theremin she had set up for her retro/steampunk/burlesque/dinosaur party

An arty shot of Emily being radiant and me being startled by the camera at The Dreamstress' Ghosts of the Titanic historic costume ball

An arty shot of Emily being radiant and me being startled by the camera at The Dreamstress’ Ghosts of the Titanic historic costume ball. Photo courtesy Madame O

Emily and The Sewphist stop by to visit Mrs C and he shop before it opens

Emily and The Sewphist stop by to visit MrsC and her shop before it opens. Photo courtesy Sarah.


These women are all without fail incredible people. They’re all so diverse, but not one of them I’d be without. They bring so much to life. We’ve done photo shoots and costume parties and Sing Star and organised a wedding together.

The Dreamstress (and her visiting sister), Shell, Emily, and Sarah at Emily's awesome retro/steampunk/burlesque/dinosaur themed birthday party. Photo courtesy Madame Ornata.

The Dreamstress (and her visiting sister), Shell, Emily, and Sarah at Emily’s awesome retro/steampunk/burlesque/dinosaur themed birthday party. Yes, most awesome theme ever. No idea where I was when this was taken though! Photo courtesy Madame Ornata.

Afternoon tea after a photoshoot modelling corsets for The Dreamstress. Left to right, The Sewphist, Madame O, Emily, and me. Photo courtesy The Dreamstress.

Afternoon tea after a photoshoot modelling corsets for The Dreamstress in Emily’s amazingly decorated home. Left to right, The Sewphist, Madame O, Emily, and me. Photo courtesy The Dreamstress.

It brings me so much pleasure to have their friendship and I think myself very lucky every time I get to hang out with one of them. And I’m looking forward to hanging out with all of them real soon!

One of the few photos of most of us! Taken Shell's wedding. Left to right: Mrs C, The Sewphist, me, Shell, The Dreamstress, Sarah, and Madame Ornata. I think Emily took the photo. Nini couldn't make it to the wedding but she made Shell's necklace and earrings.

One of the few photos of most of us – although still not all! Taken at Shell’s wedding. Left to right: Mrs C, The Sewphist, me, Shell, The Dreamstress, Sarah, and Madame Ornata. Emily took the photo! Nini couldn’t make it to the wedding but she made Shell’s necklace and earrings.

My wonderful friends, I love you all!

FO: Corazones pencil skirt

1 Jul

Some posts fight the writing. This is my third-and-a-half attempt at this.

First, I typed a massive draft into WordPress, which ate it, leaving me paranoid. Then I organised for a friend to grab some photos, but they came out rotten. So, more than a year after I made it, and benefiting from the magic that was sunshine plus skilled and willing friend Sarah plus camera, I finally started again! Except I got half way through THIS draft and had to dash to the hospital to collect punk-flatmate who’d busted his leg and when I came back, WordPress had mangled it again! Can I get to the end successfully?

Assuming I have, then may I present to you my Corazones heart pencil skirt!

So damn bright! And once again, massive thanks to the wonderful Sarah for helping me to pump out all these photos. She's awesome!

So damn bright! And once again, massive thanks to the wonderful Sarah for helping me to pump out all these photos. She’s awesome!

I’ve already told you about my seriously yellow skirt, and for those of you who obsessively commit my posts to memory, you’ll recall I hinted at a backstory to come. This is that backstory.

I decided at the beginning of last year to pump out a bunch of pencil skirts in a row. I figured that way I’d get to perfect the fit and the technique, and as I thrash my RTW pencil skirts I knew they’d be a winner. I managed two; this one and the yellow one. Best laid plans and all that. But I love them both so it was still a win!

My hem isn't quite that crooked, I simply have my leg bent.

My hem isn’t quite that crooked, I simply have my leg bent.

As part of this plan to assembly line some skirts, I decided to draft my own pencil skirt block first. And I did! I used these two tutorials to do so. The first time it didn’t work out so good as I didn’t get the hip point right. The instructions suggested that the hips, should be 20cm below the natural waist as this was about standard “unless very tall” but I had come to the conclusion that my natural waist was higher than average (a conclusion I’m not so sure about now, more on that another day) so I drafted my hips in lower. That didn’t work so I redrafted it following the instructions and the fit was much better! However it’s not perfect: there’s a slight tilting of the side seam (that I didn’t notice) and a slight puddling of fabric at the top of the zip.

While not a huge hassle for this skirt, I decided to correct for the puddling at the top for the yellow skirt by carving out a tiny crescent moon, in effect deepening the back waist curve. What I noticed on the yellow skirt though is that the waist fits better but the side seam tilt is worse! So, more fine-tuning of the draft to come.

My back seam is also not crooked and that is also more bent legs causing issues!

My back seam is also not crooked and that is also more bent legs causing issues!

What is a bit of a hassle on this skirt is that it is very snug. I did do a muslin, but didn’t stay-stitch the waist and I think that allowed jut enough bias stretch to disguise the firm fit. However, I still frequently wear this – just not if I’m going out to lunch or dinner, heh.

Again, I adjusted for this on the yellow skirt by reducing the seam allowance – and then took it all back in again! Then again, the yellow skirt is stretchy, and this most certainly is not, given the quilting cotton and lining.

The cotton is ‘Corazones Hearts’ by Alexander Henry from the Folklorico range, and depict Mexican sacred hearts. I don’t know much about Mexican sacred hearts other than that it is Mexican-folk-art-meets-Catholic-iconography, but neither of these was why I bought it. I bought it because I love the colours. It features many of the jewel tones I love to wear, including red, purple, turquoise and teal, and I pair the skirt with all of them. Sometimes at the same time! Note the red shoes, purple tee, and turquoise jewellery!

I like my pencil skirt to come to just below the knee, and that was one of the advantages of drafting my own. RTW skirts all seem to be far too short for my preferences!

I like my pencil skirt to come to just below the knee, and that was one of the advantages of drafting my own. RTW skirts all seem to be far too short for my preferences!

I lined it with what I think is an acetate, acquired from Global-that-was when they had a sale and I decided to stock up on lining. I liked the abstract print. Which turns out to not be an abstract print but “DKNY” in lots of different directions. I don’t like wearing branded clothing, so this won’t ever end up as a visible lining, but it’s great for skirts!

Construction was mostly pretty easy as I’ve done lots of skirts and they all work the same way. I did have to look  up the vent in my trusty Reader’s Digest book, but what was very straightforward. I also had to do some Googling for inserting a lining into a skirt as I hadn’t lined a skirt before. This resulted in me cobbling together a bunch of tutorials in a rather daft way. Somewhere (Threads??) I read about a technique to not have to interface a facing by cutting the lining in full and inserting it between the facing and skirt, top-stitching the bottom facing edge over the top before insertion, and therefore using the lining as the strength layer. I thought that sounded clever. I also read in Sunni’s tutorial about lining  about not darting a lining, but pleating it, so as to give the lining a bit more room to move. That also sounded clever. And because I didn’t want to do any more measuring or drafting, both of them sounded easier than chopping the facing portion off the lining and attaching the lining to the bottom of the facing. But I foolishly tried to combine the two, which meant I ended up with all the extra give from the pleats being totally superseded by the overlapped facing! Whoops!

My accidentally DKNY lining

My accidentally DKNY lining


I also didn’t know how to line the vent, and although Sunni’s tutorial seem very comprehensive it seemed very comprehensive, if you know what I mean, and I couldn’t be assed, so I simply cut a vent sized piece out of one side of the lining and hemmed the edge! Lazybones! I will do it properly in another skirt, one day.

You know, when I get around to it!


FO: the world’s oldest finished UFO* (or, the technostretch top)

26 Jun

*I have no actual proof of this. There has been no rigorous scientific testing (or indeed, any testing of any kind, scientific, rigorous, or other). But I’d like to posit that this ranks pretty highly.

Because I finished it in 2014.

And I started it in 2002. Give or take a year. I figure I can be vague on the details when it is more than a decade old.

Once again, lots of bedroom eyes because argh-the-sun-it-burns-it-burns!!!

Once again, lots of bedroom eyes because argh-the-sun-it-burns-it-burns!!!

This top was part of the transition from Making-Mum-Sew-For-Me to What-Do-You-Mean-I-Have-To-Do-It-Myself??? that occurred around the turn of the century, when my mum finally cottoned on to my devious undertakings. As such, I still hadn’t figured out a bunch of the finer details, such as the fact that the size on the envelope bears no relation to either (a) the size in your RTW or (b) the measurements the envelope suggests go with that size. I cut it, sewed it, discovered it was far too small, and shelved it pending a solution.

I also made this before my natural-fibre-snobbery had taken hold, and the fabric is a highly synthetic, very stretchy woven with a metallic sheen and a slightly plastic touch. The Arthur Toye of last decade sold it as Technostretch. My then-favourite RTW shop sold lots of pencil skirts and fitted tops and jackets in this stuff, and I was enamoured by it, so I coveted all the colours when I found it in Arthur Toye and finally bought this dark blue, shot with black.

When I moved to Wellington in 2003, this came too, and continued to languish in the corner while I fumbled around teaching myself things. Finally, in about 2005, I started going to weekly sewing group, which was amazing! It was a small group, and was not quite a sewing class. Each person made their own projects in their own way, but the teacher would provide advice, guidance, bail you out off difficulty, and provide some specialist tools. I decided to exploit her knowledge and asked her to help me fix this top. I dug it out and we had a look at it.

I used Vogue 7234 because I loved the panelling and princess seam details. The panelled nature of the top was my saving grace. I picked it all apart, and reconstructed it using 0.5cm seam allowances, and miraculously it fit! The suuuuper stretchiness was my other saving grace (are you allowed two? I’m having tw0). It’s a very forgiving fabric and this helps get the fit just right, without mock-up or adjustments (other than seam allowance). So between the changes it fit and I was stoked!

But… something still wasn’t right. The underarms gaped. So we shortened the straps slightly. They still gaped. We shortened. They gaped. Shortened. By now there was no more left to shorten  and it still gaped, so I abandoned it to my sewing cupboard, thinking I’d figure it out one day.

Stolen from the internet so I don't have to photo it, and uploaded to distract from a lack of photos

Stolen from the internet so I don’t have to photo it, and uploaded to distract from a lack of photos

I was privileged to meet MrsC and co-adopt each other in 2008. At some stage over the next year or two it occurred to me to ask Maryanne for her ideas on the technostretch top. Like the guru she is, she told me how to fix it! The top is faced with narrow binding and this had stretched a bit.  So I laboriously unpicked the binding and used her magical tape technique to stabilise the underarms. Tadah! It was now sitting great!

This highlighted to me the benefit of having lots of sewing mentors; and the difference experience makes. My teacher was a very experienced RTW machinist and taught at a fashion institute. She told stories of how when she started she had to sew 40 collars, 40 cuffs, 40 plackets, etc etc, and get them all perfect before she was allowed to start assembling garments. But as a RTW machinist, she’d never really had to worry about fit. MrsC on the other hand had garnered her experience from, amongst other things, theatre and custom bridal, where every garment is made to fit someone. She has all the tricks to making one garment conform to its matching body.

Once again heaps of thanks to Sarah for taking all my photos!

Once again heaps of thanks to Sarah for taking all my photos!

The downside of solving the underarm gape was that I realised the strap shortening meant the underarm binding now sat right up in my pits, slowly rubbing and driving me crazy. ARGH! Luckily one of the things I was taught a long time ago is never to throw out your scraps until a garment is completed (and I tend to hold onto them even longer than that). I had no scraps long enough to cut new straps BUT I did have one actual strap I’d made and left scorch marks on when pressing! I’d also recently  bought some rectangular rings** for bag making wit mum, and I realised that that was the solution! But the rings were at Mum’s in Auckland, and she didn’t know where they were. And I forgot to dig them out when I was next at her place. And forgot the time after that. And forgot and forgot etc etc yadah yadah yadah.

Finally, she found them and posted them to me! Yay! Of course, I then lost them for at least six months. And then sat on the project awaiting motivation for another, oh I don’t know, year, or two, or three.

And then about March I finally dragged the top out, unpicked the two straps at the front, sliced off the scorched part of my surplus strap, sliced the remnant in half and inserted the halves. Then I figured out where the rings go, cut off the surplus, stitched them in place, and WHOLLY FREAKING MOLY I FINISHED IT!!!!!!!!!!!!!!!!!!!!!

Of course, I then realised that the scorched strap was ever so slightly wider than the new two. And the straps are fractionally too long now. And it doesn’t quiiiiite have enough room for my ass so it rides up a bit at the back.

Butt induced wrinkles

Butt induced wrinkles

Don’t care. DON’T CARE. It is done and I love it. Now I just need summer to get here so I can wear it on days that aren’t freak weather anomalies! (Who am i kidding. It’s Wellington – I’ll need freak weather anomalies during summer too!)

**I am aware that by their very nature rectangular rings can’t be rings. But I don’t know what else to call them!

I'm still feeling guilty about the lack of photos, so here is Minerva being adorable. This is the chair in my sewing room she likes to sleep in while I work.

I’m still feeling guilty about the lack of photos, so here is Minerva being adorable. This is the chair in my sewing room she likes to sleep in while I work.


FO: Peggy Sue slouch beanie

11 Jun

So, an awesome combination of things happened Sunday before last.

  • It was insanely sunny and warm, especially given it was the first day of Winter as we do our seasonal reckoning
  • My talented photographer friend Sarah visited me
  • She brought her camera
  • She agreed to take lots of photos.

And lots of photos were taken of lots of things! So I can finally catch up on masses of unblogged creations!

I’m going to start you off with something simple. Some awesome knitting.

It was really really REALLY bright. I'm avoiding looking at the sun at all costs.

It was really really REALLY bright. I’m avoiding looking at the sun at all costs.

Well, mostly awesome knitting.

After finishing my Peggy Sue cardigan, I had some yarn leftover and wanted to do something simple while I mentally laboured over the planning for my next cardigan (which I’ve now just finished too!) So I grabbed a simple knitted-flat-and-seamed beanie pattern and cast on. I didn’t bother swatching, just sized up the same way I had for Peggy Sue, and got into it.

Arrrgh I need to trim my fringe!

Arrrgh I need to trim my fringe!

I did have to frog quite a bit on my first attempt as I missed the itty-bitty-but-really-important piece of text that said “knit in stocking until it measures 16cm” and so I started my shaping immediately after the rib band, resulting in something a little like a yarmulke, whoops! But after ripping back the shaping and checking the pattern, I was away.

I’m not sure I was very good at measuring the 16cm though, because this has happened.

Do I have short head? Can I not measure? Is it a typo? Regardless, this is not what I was expecting!

Do I have short head? Can I not measure? Is it a typo? Regardless, this is not what I was expecting!

I wasn’t frogging it a second time though, so I’ve decided that it’s not a beanie, it’s a slouch hat, and the extra height is perfect for going over my pony tail. Sometimes in the wind it slides down into my eyes, so I’m just going to have to wear it with a bobby pin or two to secure it at a jaunty angle.

image

I could fix it by wearing it with the brim turned up

Normally my blog posts have lots and lots of words (so much so that the next post I’m drafting I’ve had to split into two) but somehow this one doesn’t warrant it. Consider it a reprieve until my next overly wordy post appears!

image

Or maybe I'll just wear it like this!

The tale of 12,000 beads

23 May

A long time ago, in a galaxy far far away About 14 years ago, as a uni student, I got a part time job in a costume jewellery shop. It was a tiny store, owned and run by one woman. It stocked costume jewellery, bags and shoes made from matching leather, hats, and gloves. Basically everything you needed for a bridal party, mother of the bride, school ball, or other fancy schmancy event. Or you know, for fun.

Although some of the costume jewellery was bought from wholesalers, some of it was designed and made by the owner. I worked one and a half days a week, sole charge, and on those days one of my jobs became to make replacements for any jewellery sold during the week. The owner would leave me with a box of supplies and her design specs, and in between customers I would make jewellery. This was where I learned the basics of jewellery making, skills I still use!

Eventually, the owner decided to close the store. It came up in conversation with the owner that she had heaps of old supplies she’d inherited from the previous owner and had never sorted or used and she was going to give them away. I pounced – perhaps I could have some? She said yes!

Being a destitute and now unemployed student, my aunt agreed to be my cargo driver, so we bowled up to the owner’s house together.

There was a room haphazardly carpeted with over a dozen huge boxes of supplies, all jumbled up, no sense or structure or even labels. We didn’t have time for a through investigation so my method was simple: glance in the box; if the box looked more than half interesting take it; if it looked less than half interesting, leave it.

In amongst all the supplies there was one thing that kept catching my eye. There were dozens of small plastic containers laden with hand painted glass beads. They looked liked lollies and were just as enticing. I had to have them ALL. I’d open a box and see them and claim the box. My aunt would say “but you’ve got those” and I’d point out that these ones were DIFFERENT.

Beads like lollies! There were black ones and blue ones and green ones and red ones and purple ones, in lots of shapes like teardrops and eggs and hearts, and they were all hand-painted with gold swirls and little jewel-like drops of colour. I loved them.

Beads like lollies! There were black ones and blue ones and green ones and red ones and purple ones, in lots of shapes like teardrops and eggs and hearts, and they were all hand-painted with gold swirls and little jewel-like drops of colour. I loved them.

Eventually we exchausted our stamina (and more constraining, my aunt’s boot space) and we left. I had claimed 9 banana boxes of supplies. Now, in fabric that might not be much – but this was jewellery supplies. Tiny tiny things. So imagine how many supplies were in those 9 boxes!

The boxes went into storage for a couple of years while I moved around, but once I settled I dug them out and started the laborious process of sorting the contents. Like went with like: beads with beads, chains with chains, clasps with clasps, etc. Then I sorted inside each of those categories, by colour or type or similar. This significantly reduced the amount of space it all took up (as I threw out bags and bags of snaplock bags that weren’t needed), got me familiar with my haul, and appealed to my ‘must-organise-all-the-things brain.

As I did this, I grouped the plastic containers of glassy lollie goodness together. And eventually discovered I had over 60 of these plastic pots, each with a different design of bead in it. It was, to use a technical term, LOTS.

How they were stored. There are more in the drawers and those are more underneath too.

How they were stored. There are more in the drawers and those are more underneath too.

I was a little overwhelmed by the quantity. I could never make enough jewellery to use them all. And they hadn’t been cleaned, meaning the holes were filled with glass dust and using them required cleaning the holes out first. So although I made one or two pieces I mostly just moved them around the house over and over again trying to make them take up less space then they did without the use of a TARDIS, with limited success.

Eventually I realised my tastes had changed and I was no longer drawn to these beads – and even if I made them all into jewellery I could never sell it all, so l decided to sell the beads.

I sold them at markets. I sold them on TradeMe. I sold and I sold in packets of 10 and 20, and after a while I sat back and realised… I’d barely made a dent. So. Many. Glass. Beads.

The beads had stopped being inspirational and exciting and started being a millstone, taking up both physical and mental space in my life. They sapped my creativity, made me feel guilty and uninspired. I had to get rid of them but was out of ideas.

Then one day I was reading some unsolicited mail from the Child Cancer Foundation, asking for donations. They told a story of a young child who had undergone so many procedures, and made reference to their Beads of Courage programme, where they give away a bead for every procedure, so that every child has a long strong of beads to mark their history. I looked at the photos of the beads and thought “they’re so pretty. They’re just like mine.” And like that, I made the connection.

I contacted the Child Cancer Foundation and asked if they would like to have my beads. They were so excited! They’d love to have them, we just had to get them to Auckland.

Could I post them? they asked.

No. No I cannot. There are lots.

Could they put them in someone’s carry on luggage? they asked

No. No you cannot. There are LOTS.

Sorted out ready for packing. I couldn't get them all in a close shot. Still haven't figured out how many there are?

Sorted out ready for packing. I couldn’t get them all in a close shot. Still haven’t figured out how many there are?

Eventually we agreed that we’d wait until Mechanic Man was heading north and load them into the van for him to drop off. It took a couple of months but eventually he was ready for a trip north.

I hauled all the beads out and tried to figure out how to pack them in a way that was transportable and could be carried by one person, and as I did so I decided to do a quick bit of maths.

Based on the average weight of the bead, and estimating the number of beads in each container, I worked out I had 10,000 to 12,000 beads, weighing about 70 kilograms and taking up over a cubic metre of space.

That, people, is the very essence of a LOT of beads.

Does this help?

Does this help?

Mechanic Man dropped them off to the Child Cancer Foundation, who has arranged an army of volunteers to clean all the holes and anneal the beads to make them safe for children and their families. The people there were so excited, I wish I could have been there to see it! I asked Mechanic Man to take a photo with this post in mind, but he’s not that way inclined and forgot. So you’ll just have to imagine it.

It's hard to tell, but the three large cardboard boxes stacked around the motorbike? They're ALL BEADS.

It’s hard to tell, but the three large cardboard boxes stacked around the motorbike? They’re ALL BEADS.

So I have divested myself of 12,000 beads. Of 70 kilos of beads. Of over 1 cubic metre of beads.

So after 14 years, I created physical space in my home, mental space in my creative juices, and made a bunch of people very happy. It’s one of the most satisfying things I’ve ever done with jewellery. And to top it off, I got a Christmas card from them saying that they’d been giving the beads away to parents and siblings of their child cancer clients, who were making their own necklaces, or earrings, or even Christmas decorations out of them.

I did keep one bead of every design, for sentimental reasons, of course!

Now don’t get me wrong – these weren’t the ONLY beads I got that fun day 14 years ago. I’ve kept all the others, so I can still continue to create jewellery, but the ones I’ve got left take up much less space and remain exciting to work with. But clearing out those beads? That was truly a moment of satisfaction!